

In this article, you will learn how to upload an android application to the google play store. We will also see how to generate a signed apk which we will need to be able to upload it to the google play store.
If you are interested in becoming a professional software developer, make sure to check out our courses!
Generate a Signed APK in Android Studio
For this, you need to have an App ready for publishing. Open the project in the Android Studio once it is completely built. Follow these steps to generate a signed APK.
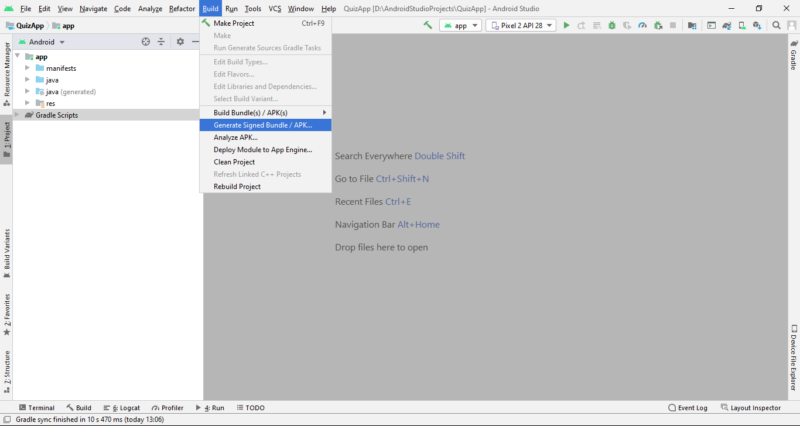
In the menu bar, go to Build and select the option Generate Signed Bundle or APK.
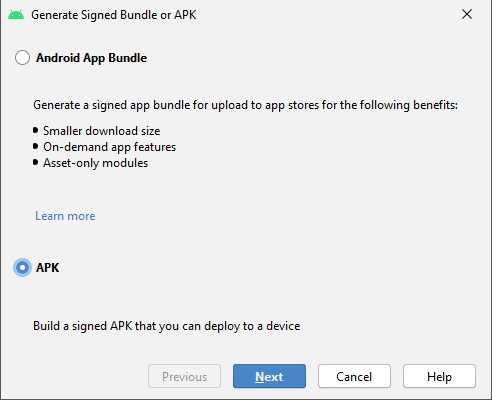
You will see a new popup screen where you will have two options to select, Android App Bundle and APK. The Android App Bundle is also used to upload the application to the Google Play Store we will talk about it later on.
Here you need to select the option APK. After that, click on Next.
Then you will see this screen.
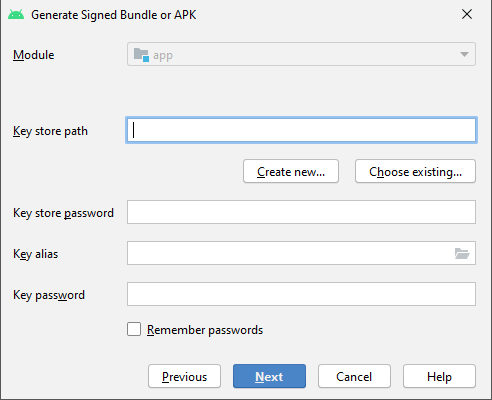
Then click Create new… to create a Keystore file. If you already have the Keystore file, you can select the Choose existing…. button. We will create a new file as we don’t have one.

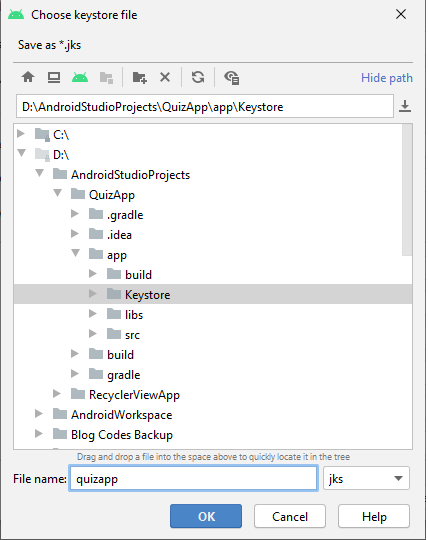
The above image is the form for creating the new Keystore file. First, you need to select the file path and name the file. Click on the folder icon in the Key store path to enter the Keystore file’s name and choose the way.
We named the Keystore file and selected the path after doing that click the OK button.
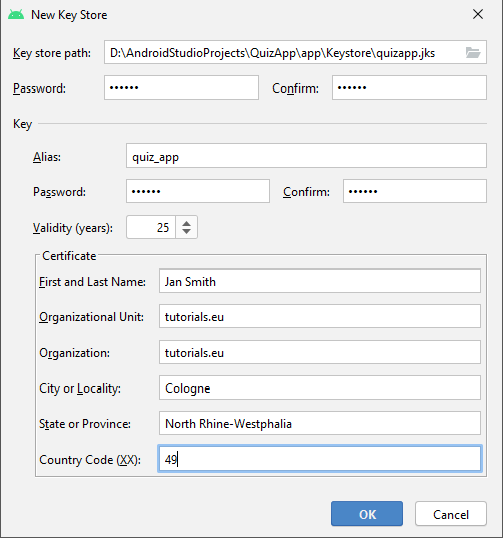
Now, enter the other details to create a Keystore file and click on the OK button.
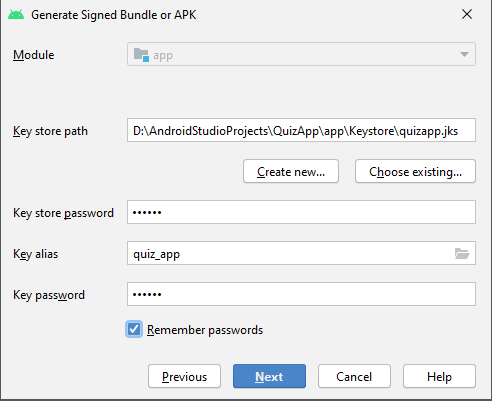
After filling all the details and clicking on the OK button, the Generate Signed Bundle or APK will look like the above image. You can also select the Remember passwords if you are only using your PC and don’t want to type the password whenever you are generating the signed APK. Now, click on the Next button.
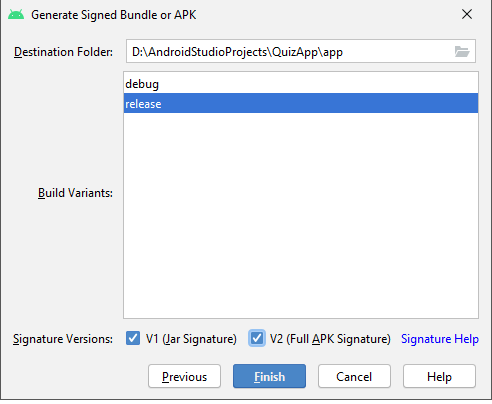
The default destination folder is the app folder of the application. We can change it if we want to select a different path. Select the Build Variants for which you want to generate the signed APK, here we will choose the release option. After choosing the Build Variants, you can now select the Signature Versions. We will choose the options as V1 (Jar Signature) and V2 (Full APK Signature) as we target all the devices. Now click on the Finish button to complete the process of Generating the Signed APK.

That’s it. You have successfully generated a Signed APK. After completing all the above steps, you will finally see the Signed APK in the folder path. We can upload this APK in the Google Play Store. You can rename the APK file if required for your reference.
The form you have selected does not exist.
The form you have selected does not exist.
Upload the Signed APK to the Google Play Store
Now you’re ready to opt your app to App signing by Google Play and upload your app for release.
Sign in to your Play Console. There is a one time fee for your google play console of 25$.
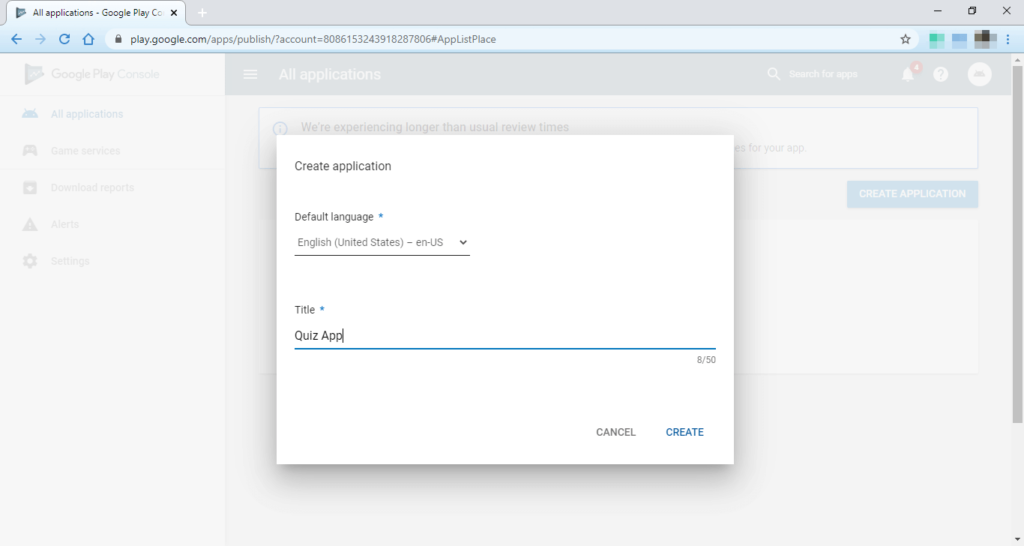
Once you launch the Google Play Console, you will see the below screen.
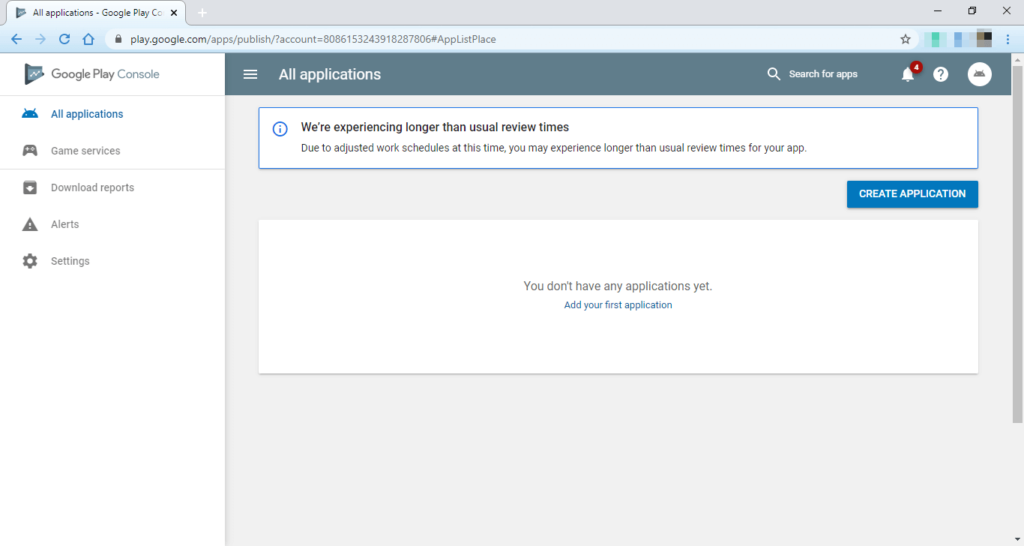
Now Click on the CREATE APPLICATION button. You will see the below screen where you can select the Default language and add the Title of your application, after selecting the Default language and adding the Title click the CREATE button.
Once done with creating an application, you will see the below screen: Store listing.
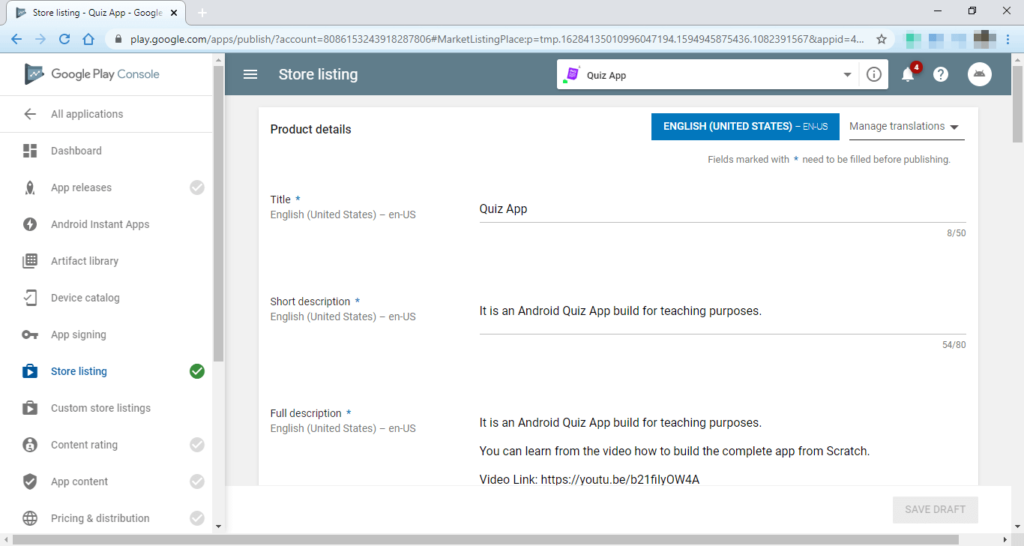
In the Store listing page, fill all the mandatory fields as below.
- Title: You can update your title here, as we have already added in the previous screen.
- Short description: Enter a short description of your application of max 80 characters.
- Full description: Enter a full description of your application of max 4000 characters.
- Graphic assets:
4.1. Upload a high-resolution icon of your application with a size of 512 * 512.
4.2. Upload the screenshots of your application. At least 2 screenshots are required overall. Max, 8 screenshots per type.
4.3. Upload the Feature Graphic image with a size of 1024*500. - Categorization:
5.1. Select the Application type.
5.2. Select the application Category. - Contact details:
6.1. Enter your Website.
6.2. Enter your Email address.
6.3. Enter your Phone number. - You can also fill other information, which is not mandatory if you want.
- Click on SAVE DRAFT.
The form you have selected does not exist.
The form you have selected does not exist.
Now, select the App releases option from the left-hand side menu. After selecting the App releases, you will see the below screen.
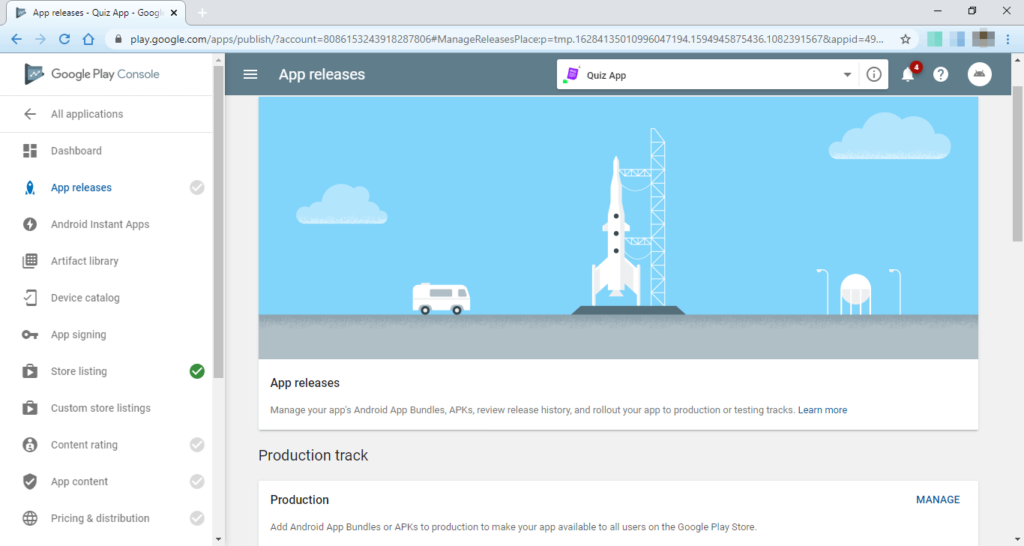
In the above screen, you can see multiple options like Production track for Production means publishing your app on Google Play, Open track, Closed track, Internal test track, and Pre-registration. These features have different purposes, which we will discuss later on now, as we are publishing our application so you can select the Production and click on MANAGE. After clicking on MANAGE, you will see the below screen.
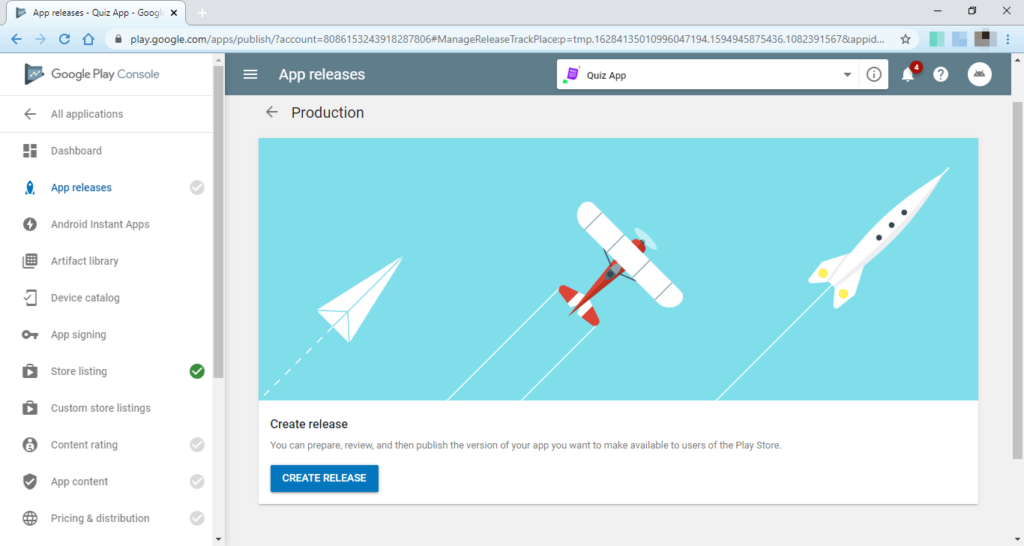
Click on the CREATE RELEASE button.
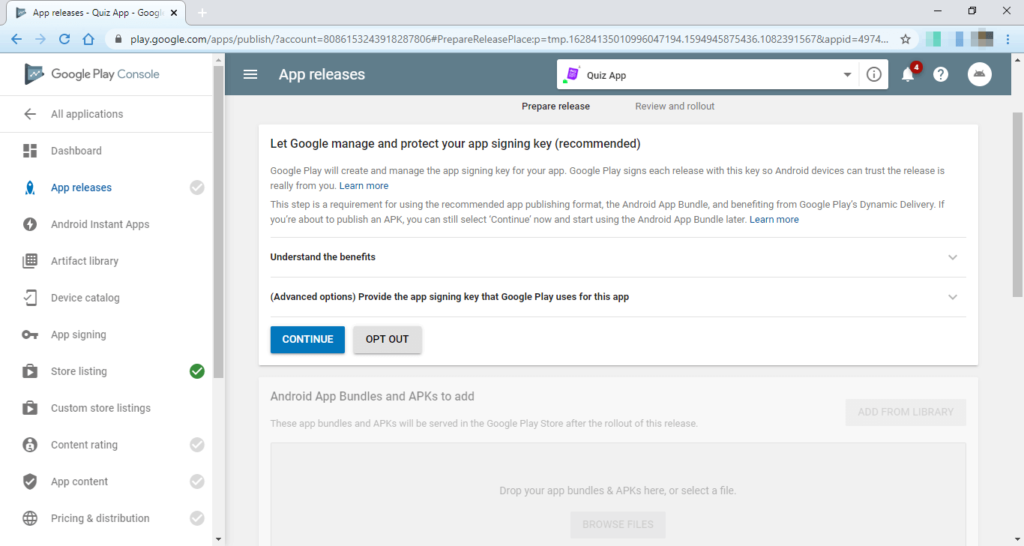
In the above screen, there are two options to select. We will select the OPT OUT. There is a new feature of google play. With app signing by Google Play, Google manages and protects your app’s signing key and uses it to sign your APKs for distribution. It’s a secure way to store your app signing key to protect you if your key is ever lost or compromised. We will discuss this feature later on. As of now, you can OPT OUT.
After selecting OPT OUT. Upload the generated signed APK.
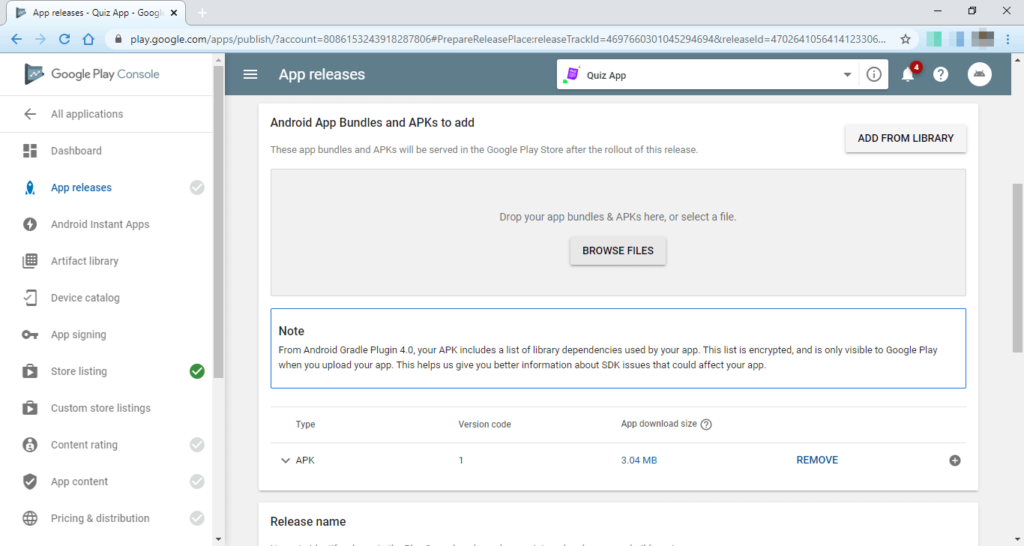
You can see the APK is uploaded successfully with version code 1. Here the version code is essential in terms of updating the app in the future. You can change the version code in the build.gradle file.
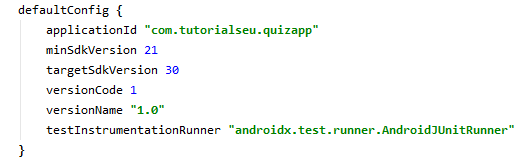
The version name used for our reference purposes in the google play console you can see it shows the Release name. You can update both version code and version name whenever you are updating the app or provide a new update of your application. You can not upload the same version code again once it is published.
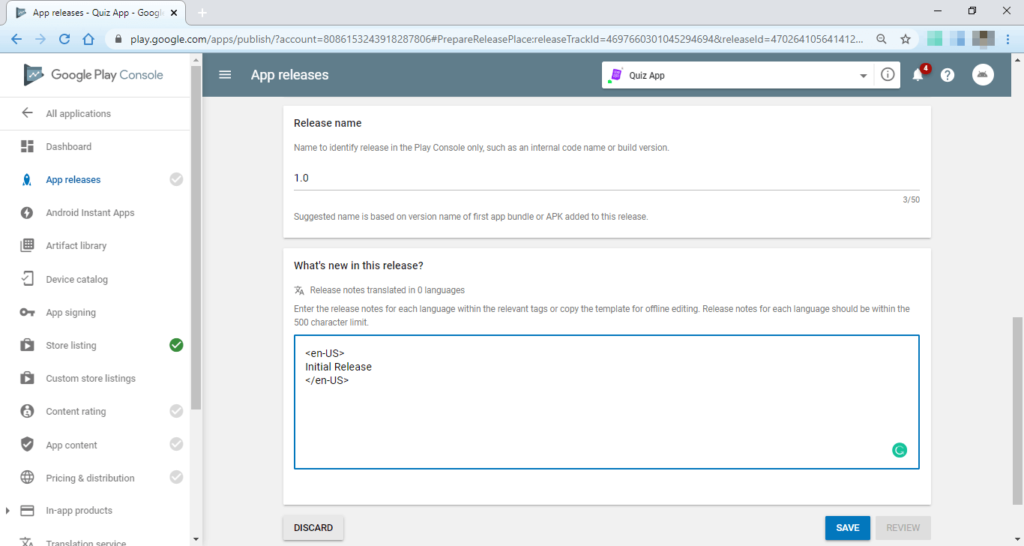
After uploading the APK, you have an option: What’s new in this release? Where you can mention the updated features of your app. We are uploading the app for the first time, so we have written the text as Initial Release. Now click on SAVE.
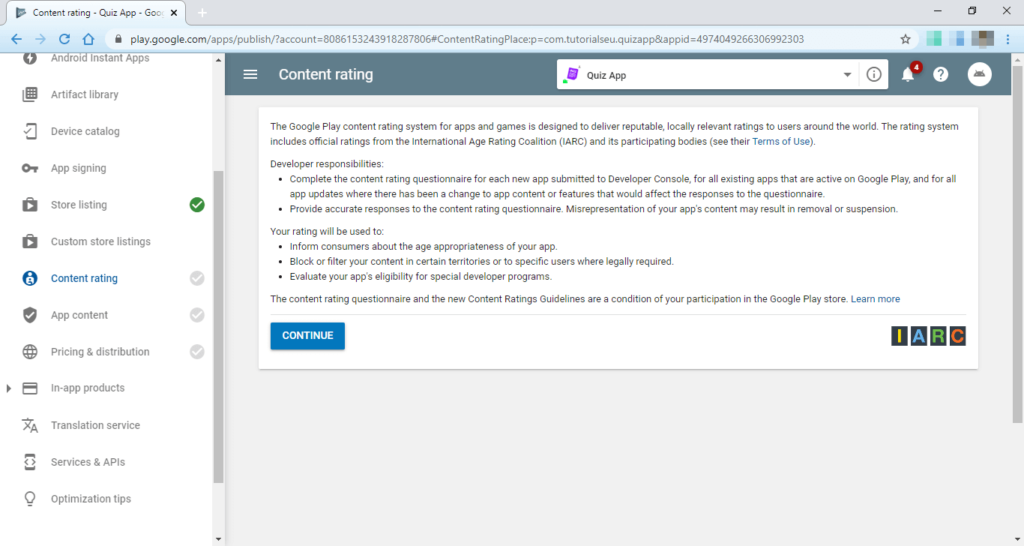
Now, as we are done with uploading of the APK. Select the Content rating option from the left-hand side menu. After selecting the Content rating, you will see the below screen.
Click on the CONTINUE button. After doing that, you will have options to enter an Email address and Select your app category. Read all the categories and select the one which is suitable for your application. We have chosen the REFERENCE, NEWS, or EDUCATIONAL after that you will see the below screen.
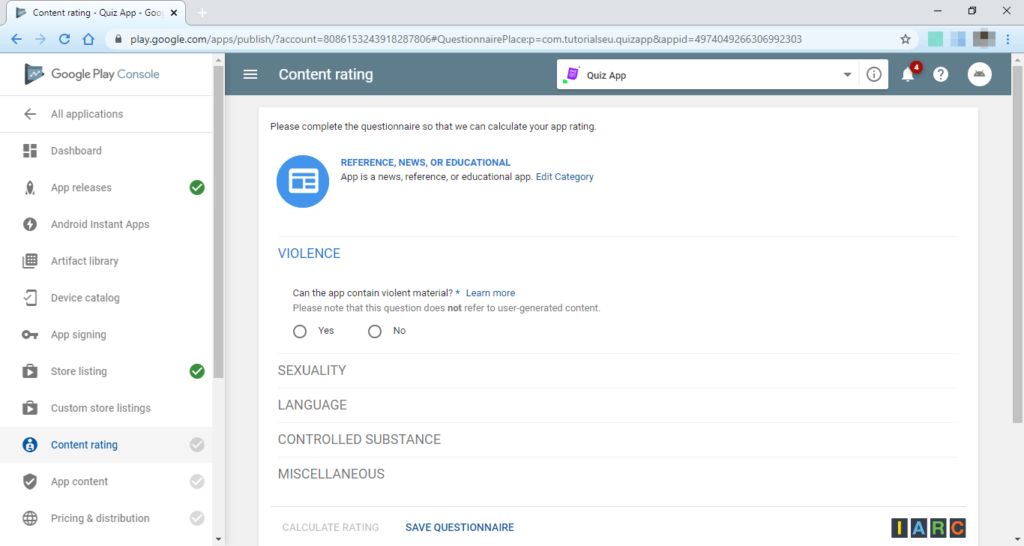
Answer all the questions and click on the SAVE QUESTIONNAIRE. Once the answers are saved, you will see an option to CALCULATE RATING. Click on the CALCULATE RATING. You will see the below screen.
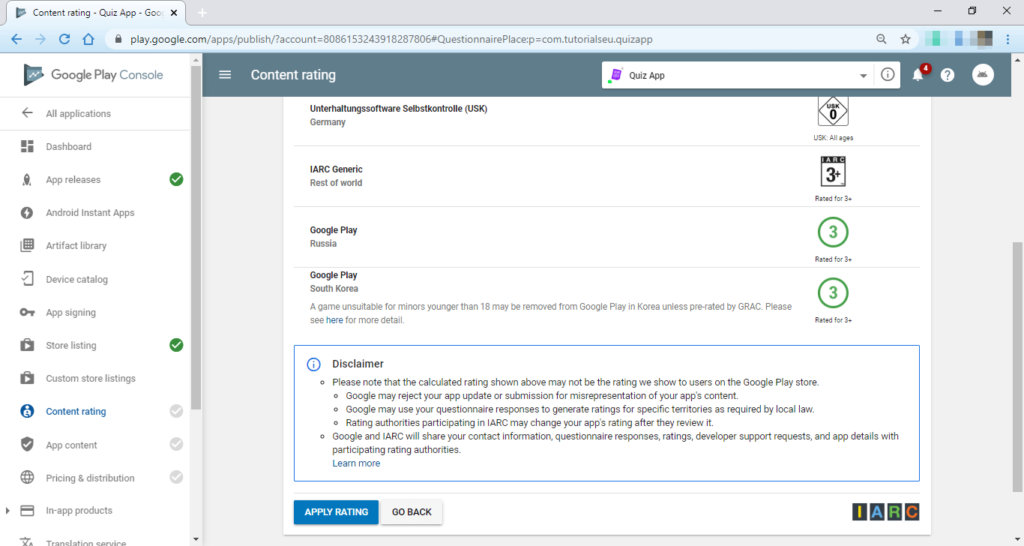
Click on the APPLY RATING, and the Content rating is done.
Select the App content option from the left-hand side menu. After selecting the App content, you will see the below screen.
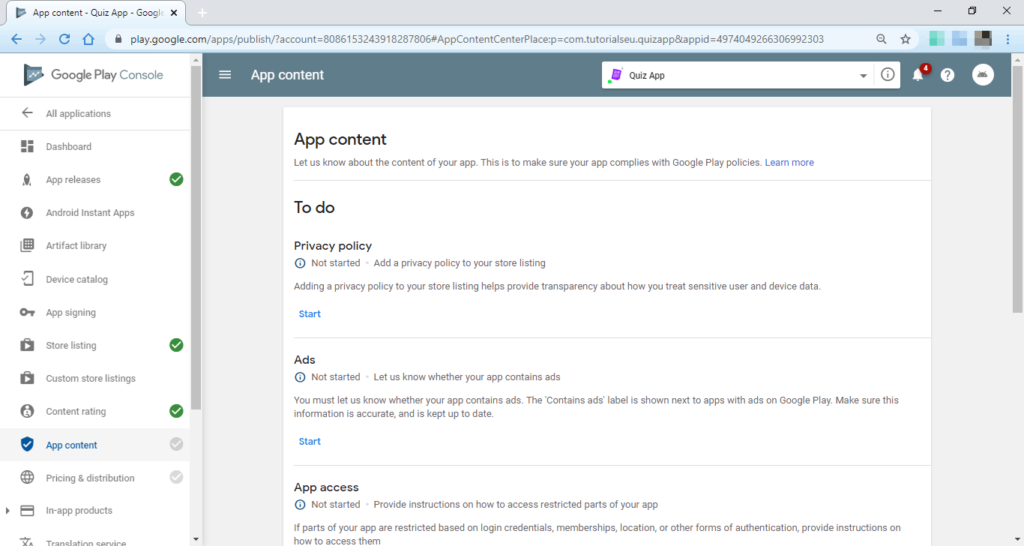
Now complete all the To do as shown in the above image as Privacy policy, Ads, App access, and Target audience and content. You need to answer a few questions and get it done.
In the Privacy policy, you need to add the link to your privacy policy page. Add a privacy policy to your store listing to help provide transparency about how you treat sensitive user and device data. You must add a privacy policy if your target audience includes children under 13.
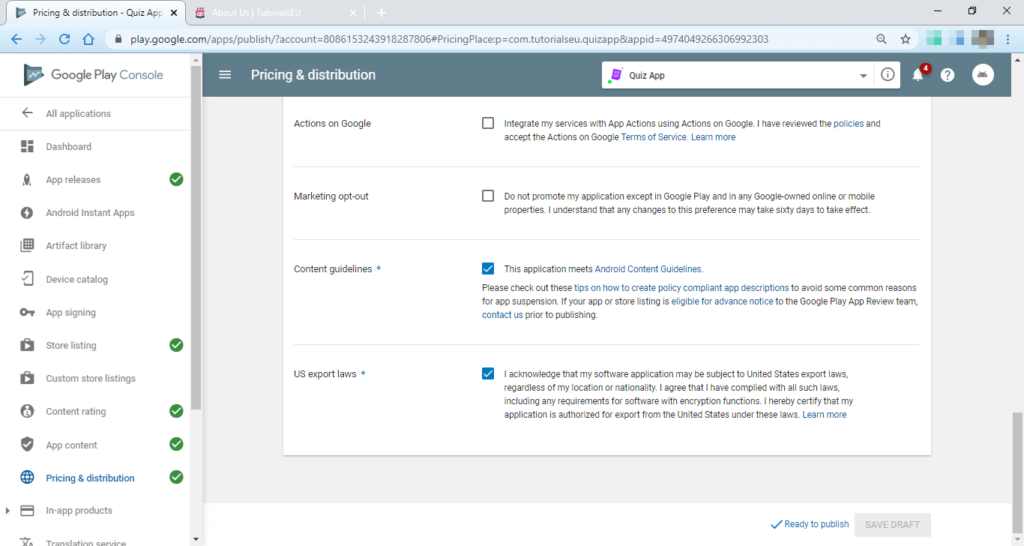
Once you complete the App content. Select the Pricing & distribution option from the left-hand side menu. After selecting the Pricing & distribution, you will see the below screen.

Update all the mandatory fields.
- Select the countries where you want your application to be downloadable. We have selected all the countries.
- Please select the options as Content guidelines and US export laws, which states that you agree to it, which is mandatory.
Click on SAVE DRAFT, and you are done with all the input fields to publish the application on google play. After saving details, you will see an option Ready to publish besides the save draft button. You see it in the below screen.
Click on the Ready to publish. You will have a popup screen asking you to DISMISS or MANAGE RELEASES.
Select the MANAGE RELEASES, and you will be redirected to the App releases screen where we have uploaded the signed APK.
Click on the EDIT RELEASE underneath of Production track. At the bottom of the screen, you will see a button as a REVIEW.
Now click on the REVIEW button, and you will have a final step to perform, which is a button as START ROLLOUT TO PRODUCTION as in below screen.
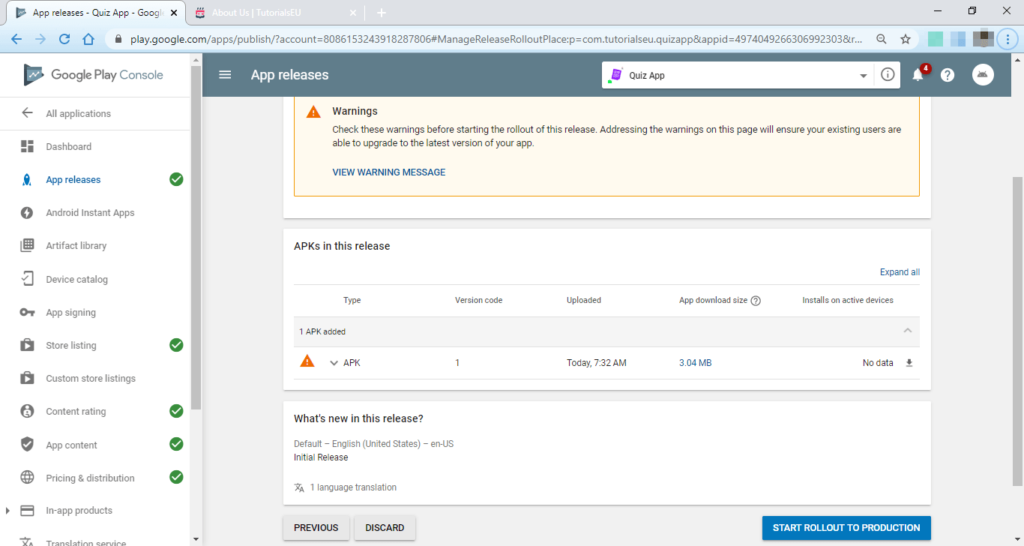
Finally, click on the START ROLLOUT TO PRODUCTION, and you are done with publishing your app to the Google Play Store. Now your app status will be Pending publication. Your app is published and under review with Google. Once Google finished the review process, it will change as the status to Published and make it available to all users to download.
That’s it. We are done generating the signed APK in Android Studio and publishing the application on google play store.
Summary
In this blog post, you have learned how to Generate a Signed APK in Android Studio and Publish the android application to the Google Play Store, covering each and everything very clearly.
The form you have selected does not exist.
The form you have selected does not exist.