


In the first part of this post we covered ViewPager2 with RecyclerView.Adapter now lets look at how to use viewpager2 with fragments. First create an activity and name it GalleryActivity.
Add ViewPager2
In the GalleryActivity layout add a viewpager2.
activity_gallery.xml
<androidx.constraintlayout.widget.ConstraintLayout
    xmlns:android="http://schemas.android.com/apk/res/android"
    xmlns:app="http://schemas.android.com/apk/res-auto"
    xmlns:tools="http://schemas.android.com/tools"
    android:layout_width="match_parent"
    android:layout_height="match_parent"
    tools:context=".GalleryActivty">

 <androidx.viewpager2.widget.ViewPager2
        android:layout_width="match_parent"
        app:layout_constraintTop_toTopOf="parent"
        app:layout_constraintBottom_toBottomOf="parent"
        android:layout_height="wrap_content"
        android:id="@+id/galleryVp" />

</androidx.constraintlayout.widget.ConstraintLayout>
in the layout above we have added a viewPager2 which will be integrated with fragments so lets create the fragment and name it GalleryFragment.
class GalleryFragment : Fragment() {

  private var binding:FragmentGalleryBinding? = null
    override fun onCreateView(
        inflater: LayoutInflater, container: ViewGroup?,
        savedInstanceState: Bundle?
    ): View? {
        binding = FragmentGalleryBinding.inflate(layoutInflater)
        return binding?.root
}

 companion object {
      var POSITION_ARG = "postion_arg"
        @JvmStatic
        fun newInstance(postion:Int) =
            GalleryFragment().apply {
                arguments = Bundle().apply {
                  putInt(POSITION_ARG,postion)
                }
            }
    }
In the GalleryFragment
- We removed all the generated code that won’t be needed
- Created a binding variable, inflate the layout and return the root in the onCreatView
- Created a bundle for passing the position from the GalleryAdapter into the fragment.
Creating The GalleryAdapter
Now lets create the GalleryAdapter
GalleryAdapter.kt
class GalleryAdapter(activity:AppCompatActivity):FragmentStateAdapter(activity) {
    override fun getItemCount() = 3
    override fun createFragment(position: Int) = GalleryFragment.newInstance(position)
}
In the GalleryAdapter class, we created an AppCompatActivity variable as a parameter in the constructor and pass in the variable into the FragmentStateAdapter that its extending. we also override two methods from the FragmentStateAdapter;
- getItemCount() : This method controls the size of the pages, here we have hard coded it to three(3) because we will be reusing one fragment and need only 3 pages. Most times you will have to use the size of the items or fragments to control the getItemCount depending on the use case.
- createFragment() : This method is used to return the different fragments by position. Here we have passed the position as a bundle and will be using it to update the list for each page.
Next is to setup the adapter with the viewPager in GalleryActivity
Setting Up The Adapter With ViewPager
GalleryActivty.kt
class GalleryActivty : AppCompatActivity() {
    private var binding:ActivityGalleryActivtyBinding?  = null

    override fun onCreate(savedInstanceState: Bundle?) {
        super.onCreate(savedInstanceState)
        binding = ActivityGalleryActivtyBinding.inflate(layoutInflater)

        setContentView(binding?.root)
        val galleryViewPager = binding?.galleryVp

        val adapter = GalleryAdapter(this)
        galleryViewPager?.adapter = adapter
    }

    }
In the GalleryActivity we have initialized the GalleryAdapter and set it to the viewPager
ViewPager2 with vertical orientation
Next is to add a viewPager inside the GalleryFragment layout
fragment_gallery.xml
<androidx.constraintlayout.widget.ConstraintLayout
    xmlns:android="http://schemas.android.com/apk/res/android"
    xmlns:tools="http://schemas.android.com/tools"
    android:layout_width="match_parent"
    android:layout_height="match_parent"
    tools:context=".GalleryFragment">

    <!--TODO: Add viewPager2 and set orientation to vertical-->
    <androidx.viewpager2.widget.ViewPager2
        android:layout_width="match_parent"
        android:layout_height="match_parent"
        android:orientation="vertical"
       android:id="@+id/galleryVp" />
</androidx.constraintlayout.widget.ConstraintLayout>
Creating the Dummy Lists
Lets add three more lists for the three fragments using the Intro data class in the PageList class
PageLists.kt
object PageLists {
val introSlides = listOf(
Intro(R.drawable.t_shirt,"Tee-Shirts","Nicely designed T-Shirt tailored to your taste"),
Intro(R.drawable.sneak,"Sneakers","Comfortable and affordable shoe wear to keep you \\n balanced while taking a walk"),
Intro(R.drawable.hoody,"Hoody","Identify with Styles by getting one of the customized \\n hoodies in store")
)
val tShirts = listOf(
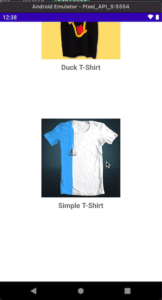
Intro(R.drawable.t_shirt,"Duck T-Shirt",null),
Intro(R.drawable.tee,"Simple T-Shirt",null),
Intro(R.drawable.tee3,"Designer T-Shirt",null),
Intro(R.drawable.tee4,"Readers T-Shirt",null),
Intro(R.drawable.teeafrica,"Africa T-Shirt",null),
)
val hoodies = listOf(
Intro(R.drawable.hoody,"Dark Red Hoodie",null),
Intro(R.drawable.hoody2,"Simple Hoodie",null),
Intro(R.drawable.hoody3,"Pink Hoodie",null),
Intro(R.drawable.hoody4,"Grey Hoodie",null)
)
val sneakers = listOf(
Intro(R.drawable.sneak,"Fashion Sneakers",null),
Intro(R.drawable.blacksneak,"Black Sneakers",null),
Intro(R.drawable.classicsneak,"Classic Sneakers",null),
Intro(R.drawable.filasneak,"Fila Sneakers",null),
)
}
Now in the gallery fragment lets setup the viewPager with the IntroAdapter which we created earlier.
GalleryFragment.kt
class GalleryFragment : Fragment() {

  private var binding:FragmentGalleryBinding? = null

    override fun onCreateView(
        inflater: LayoutInflater, container: ViewGroup?,
        savedInstanceState: Bundle?
    ): View? {
        binding = FragmentGalleryBinding.inflate(layoutInflater)
        return binding?.root
}

    override fun onViewCreated(view: View, savedInstanceState: Bundle?) {
        super.onViewCreated(view, savedInstanceState)

        val pos = arguments?.getInt(POSITION_ARG)
        val viewPager = binding?.galleryVp

 pos?.let{
        when (pos) {

                0 -> viewPager?.adapter= IntroAdapter(PageLists.tShirts)
                1 -> viewPager?.adapter= IntroAdapter(PageLists.hoodies)
                2->viewPager?.adapter= IntroAdapter(PageLists.sneakers)
            }
}
}
    companion object {
      var POSITION_ARG = "postion_arg"
        @JvmStatic
        fun newInstance(postion:Int) =
            GalleryFragment().apply{
arguments= Bundle().apply{
putInt(POSITION_ARG,postion)
}
            }
}

}
In the GalleryFragment we are retrieving the position of each fragment passed through the gallery adapter and then use the position to set different list for each page in the viewpager.
ViewPager2.OnPangeChangeCallback
Back into the MainActivity inside the pageCallback we need to set onClickListener for the finish button to open the GalleryActivity.
MainActivity.kt
private val pager2Callback = object:ViewPager2.OnPageChangeCallback(){
        override fun onPageSelected(position: Int) {
            super.onPageSelected(position)
            if (position == PageLists.introSlides.size -1){
                binding?.controllerBtn?.text = "Finish"
                binding?.controllerBtn?.setOnClickListener {
                    startActivity(Intent(this@MainActivity,GalleryActivty::class.java))
                }

            }else{
                binding?.controllerBtn?.text = "Next"
                binding?.controllerBtn?.setOnClickListener {
                    viewPager2?.currentItem = position+1
                }
            }
        }
    }
Now when we run the app and swipe two times to the left and also swipe up and down vertically, you see different items on each page
Connecting a Tablayout with ViewPager2
With the current state of the app a user will not be aware that there are other pages on the screen as well. With Tablayout you can add a title to each page for users to know that there are other items to check out.
Now Add a tablayout to activity_gallery.xml
activity_gallery.xml
<androidx.constraintlayout.widget.ConstraintLayout
    xmlns:android="http://schemas.android.com/apk/res/android"
    xmlns:app="http://schemas.android.com/apk/res-auto"
    xmlns:tools="http://schemas.android.com/tools"
    android:layout_width="match_parent"
    android:layout_height="match_parent"
    tools:context=".GalleryActivty">

<com.google.android.material.tabs.TabLayout
        app:layout_constraintTop_toTopOf="parent"
        android:id="@+id/tabLayout"
        android:layout_width="match_parent"
        app:tabGravity="center"
        android:layout_height="wrap_content"
        android:background="@color/purple_500"
        app:tabMode="scrollable"
        app:tabIndicatorColor="@android:color/white"
        app:tabIndicatorHeight="3dp"
        app:layout_constraintBottom_toTopOf="@id/galleryVp"

    <androidx.viewpager2.widget.ViewPager2
        android:layout_width="match_parent"
        app:layout_constraintTop_toBottomOf="@id/tabLayout"
        app:layout_constraintBottom_toBottomOf="parent"
        android:layout_height="0dp"
        android:id="@+id/galleryVp" />
</androidx.constraintlayout.widget.ConstraintLayout>
In the layout above we have added a tablayout and changed the viwPager2’s constraintTop to its bottom. Now lets attach the tablayout to the viewPager in GalleryActivity
GalleryActivity.kt
class GalleryActivty : AppCompatActivity() {
private var binding:ActivityGalleryActivtyBinding? = null
override fun onCreate(savedInstanceState: Bundle?) {
super.onCreate(savedInstanceState)
binding = ActivityGalleryActivtyBinding.inflate(layoutInflater)
setContentView(binding?.root)
val galleryViewPager = binding?.galleryVp
val adapter = GalleryAdapter(this)
galleryViewPager?.adapter= adapter
TabLayoutMediator(binding!!.tabLayout, galleryViewPager!!){tab, position->
tab.text= getTitle(position)
}.attach()
}
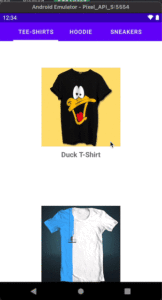
private fun getTitle(postion: Int):String?{
return when(postion){
0->"Tee-Shirts"
1->"Hoodie"
2->"Sneakers"
else->null
}
}
}
Now when we run the app we will see a title on each page of the screen, this way the user knows to swipe through other pages.
In this tutorial we have covered the following:
- ViewPager2 vertical scrolling
- Swiping between views
- Swiping between fragments
- Using TabLayout with ViewPager2