


Creating a C# REST API Client Example
In this article, we will be creating a C# REST API client example. But before we dive into the actual implementation, let’s first explain what a REST API is and how it differs from a non-REST API just so we all are at the same starting point. Luckily, we can sum this up pretty easily.
REST stands for Representational State Transfer. It is an architectural style for building web services that use HTTP methods like GET, POST, PUT, and DELETE to interact with resources. RESTful APIs are easy to understand. They follow the same structure as the web, with URIs (Uniform Resource Identifiers) representing resources and HTTP methods representing the actions that can be performed on those resources.
One of the main differences between REST APIs and non-REST APIs is that REST APIs are stateless, meaning each request contains all the information necessary to complete the request and does not rely on previous requests. This allows for greater scalability and flexibility, as there is no need to maintain a state between requests.
With that out of the way, let’s create a C# REST API client using the HttpClient class and the built-in JSON solution in C#.
Create a new C# Console App
To begin, we’ll need to create a new C# console application in Visual Studio.
- Open Visual Studio and click on “Create a new project.”

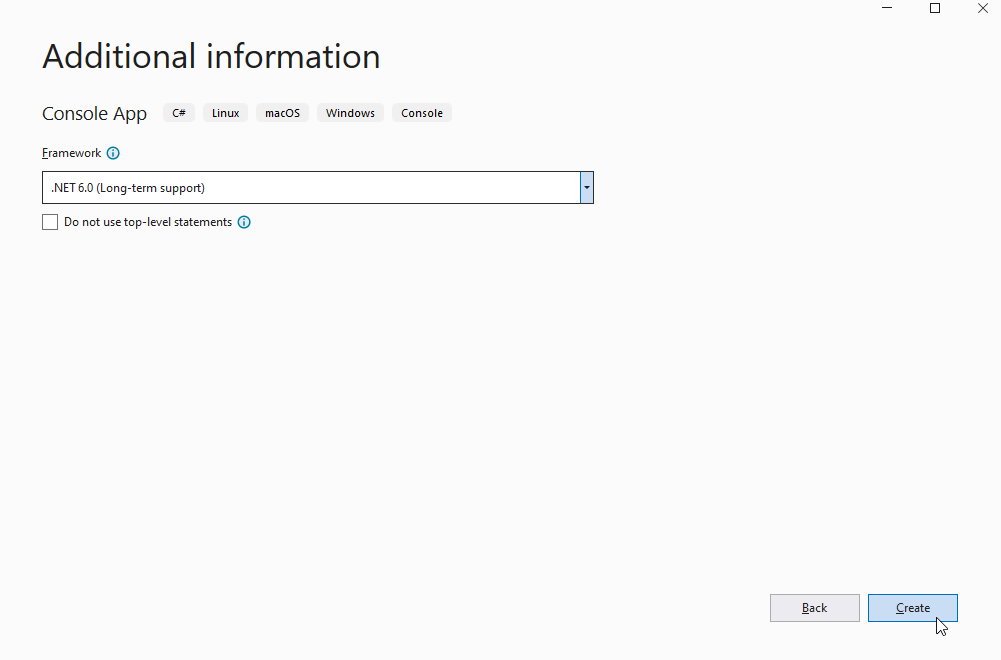
- Select “Console App (.NET 6)” from the list of templates.
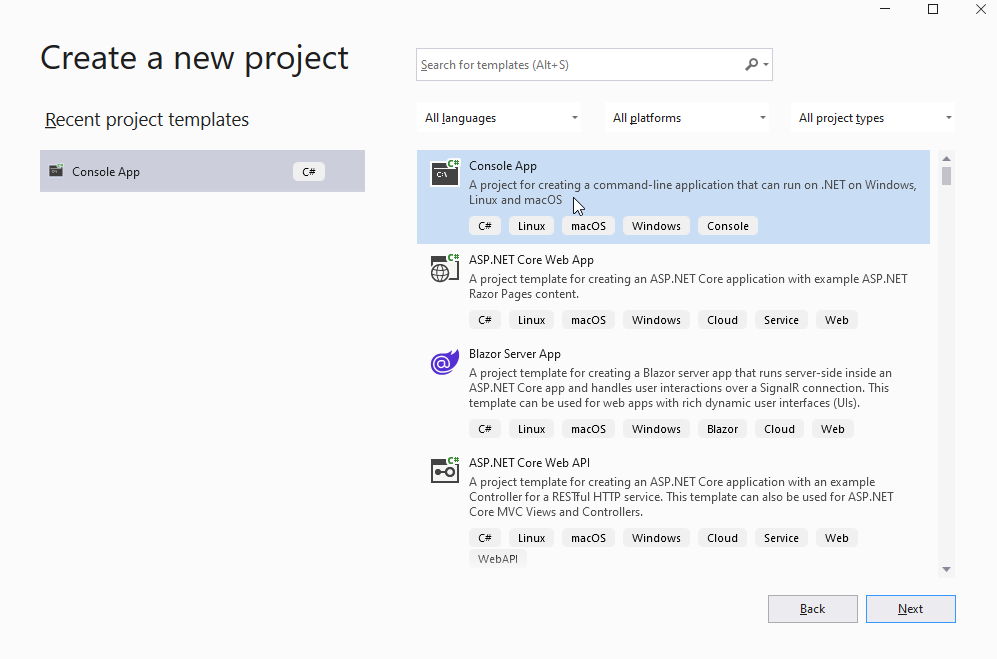
- Give your project a name, for example “CSharpRestApiExample” and click on “Create.”
Add using statements In your Program.cs file
Add the following using statements at the top:
using System.Net.Http;
using System.Text.Json;
Create a class for the API response
We will create a class for the API response to make it easier to handle the JSON data returned from the API. In the project, create a new class file named “ApiResponse.cs” In the new class, define properties that match the JSON data structure returned by the API.
class ApiResponse
{
    public int userId { get; set; }
    public int id { get; set; }
    public string title { get; set; }
    public string body { get; set; }
}
Make a GET request In the Main method of the Program.cs file
Create an instance of the HttpClient class. Use the GetAsync method to make a GET request to the API endpoint, passing in the endpoint URL as a parameter. Use the ReadAsStreamAsync method to read the response as a stream.
using (var client = new HttpClient())
{
    var response = client.GetAsync("https://jsonplaceholder.typicode.com/posts").Result;
    var responseStream = response.Content.ReadAsStreamAsync().Result;
}
Deserialize the JSON response
Use the JsonSerializer.DeserializeAsync method to deserialize the JSON stream into an object of the ApiResponse class. This will make it easier to access the data returned by the API.
var responseData = JsonSerializer.DeserializeAsync<List<ApiResponse>>(responseStream).Result;
Handle the API response
Once you have the response data in an object, you can access the properties and use them in your application. In this example, we will simply print out the response data to the console.foreach(var post in responseData)
{
Console.WriteLine("User ID: " + post.userId);
Console.WriteLine("ID: " + post.id);
Console.WriteLine("Title: " + post.title);
Console.WriteLine("Body: " + post.body);
Console.WriteLine("-------------------");
}
Handle errors
It’s essential to handle errors that may occur during the API call. Use a try-catch block to catch any exceptions that may be thrown and handle them accordingly.try
{
// Make the GET request to the API endpoint
var response = client.GetAsync("https://jsonplaceholder.typicode.com/posts").Result;
// Read the response as a stream
var responseStream = response.Content.ReadAsStreamAsync().Result;
// Deserialize the JSON response
var responseData = JsonSerializer.DeserializeAsync<List<ApiResponse>>(responseStream).Result;
// Handle the API response
foreach(var post in responseData)
{
    Console.WriteLine("User ID: " + post.userId);
    Console.WriteLine("ID: " + post.id);
    Console.WriteLine("Title: " + post.title);
    Console.WriteLine("Body: " + post.body);
    Console.WriteLine("-------------------");
}
}
catch (Exception ex)
{
Console.WriteLine("Error: " + ex.Message);
}