


In this article, you will learn how to do JSON parsing in your android application, both doing the traditional way, as well as using 3rd party libraries.
By the way! If you are interested in becoming a professional software developer, make sure to check out our courses!
The sharing of data over the Internet is a prevalent task. Nowadays, almost every application has some features to exchange the data with the server over the Internet.
The details send and receive from the server can be in XML or JSON format. When you want to use the data store using these file formats in the database, you must apply some parsing of data in your Android Application. For the JSON file, you have to use the JSON parsing, and for XML files, you can use the XML parsing. In this article, you will learn how to parse the JSON format data and use it in our Android Application. So, let’s get started with JSON parsing.
What is JSON?
JSON stands for JavaScript Object Notation. The JSON is used to exchange the data from the server to the desired place over the Internet. The XML parsing is more complicated as compared to JSON parsing.
JSON is structured, lightweight, and an independent data exchange format used to parse data. JSON is also language-independent. JSON uses the syntax of JavaScript, which is limited to text. Apart from this, nowadays, most of the APIs available to us is sending data in the form of JSON and receiving that data from API, you have to do JSON parsing, and it is straightforward to do JSON parsing.
To manipulate JSON data and to play with JSON, Android provides four classes. These classes are:
- JSONObject
- JSONArray
- JSONStringer
- JSONTokenizer
The form you have selected does not exist.
JSON Structure
JSON uses two types of brackets which are as below:
- [] – JSON uses square brackets to declare an Array’s elements in JSON.
- {} – JSON uses the curly brackets to create JSON objects elements.
JSON has the following types of structures that generally used, which are as below:
JSON Array
The elements present the list of values in the ([…]), known as Arrays. Inside the JSON array, you can put values like Integer, Boolean, String, Float, and also you can put some other JSON array or JSON object in a particular JSON array.
JSON Objects
The elements present inside the curly ({…}) brackets are known as Objects. The JSON object contains key/value pairs like the Hash map. In the JSON object, we can also use nested JSONObjects, which are very commonly used nowadays.
JSON Key-Value
The values can be in any primitive data type and are the value corresponding to a particular key. For example: “Username”:”Denis Panjuta”. Here the Username is key and the value corresponding is “Denis Panjuta”.
The form you have selected does not exist.
The form you have selected does not exist.
JSON parsing
JSON Parsing Functions
This is a list of functions in android which can be used for JSON Parsing:
- get(int index): It is used to get the value of the object type present in the JSON array. It throws an exception if there is no JSONObject in the JSON array.
- getType(int index): It gets the value of any of the mentioned types present in the JSON array. The type can be String, Int, Boolean, Long, Double, JSONArray, or JSONObject.
- length(): It is used to get the length of the array.
- opt(int index): It returns the Object Type value in the JSONArray on a particular index.
- optType(int index ): It returns the value of the mentioned types in the JSONArray on a particular index.
JSON Parsing in Android
You have learned the concept of JSON Parsing and its functions. Now, let’s implement the concept in the android project.
Create a New Project
Create a new Android Studio project:
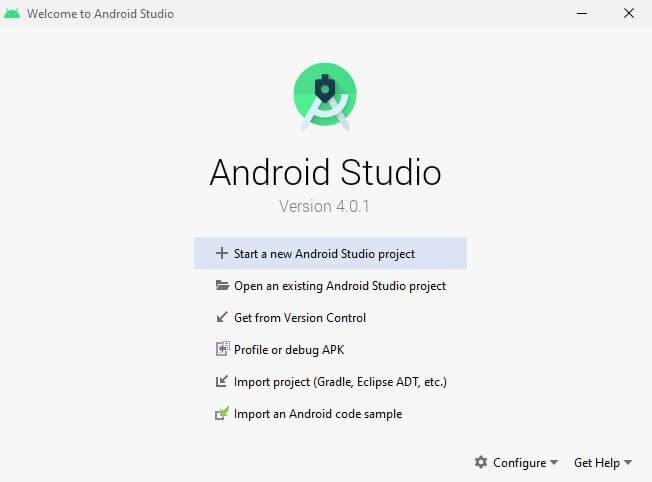
Select the option as Start a new Android Studio project:
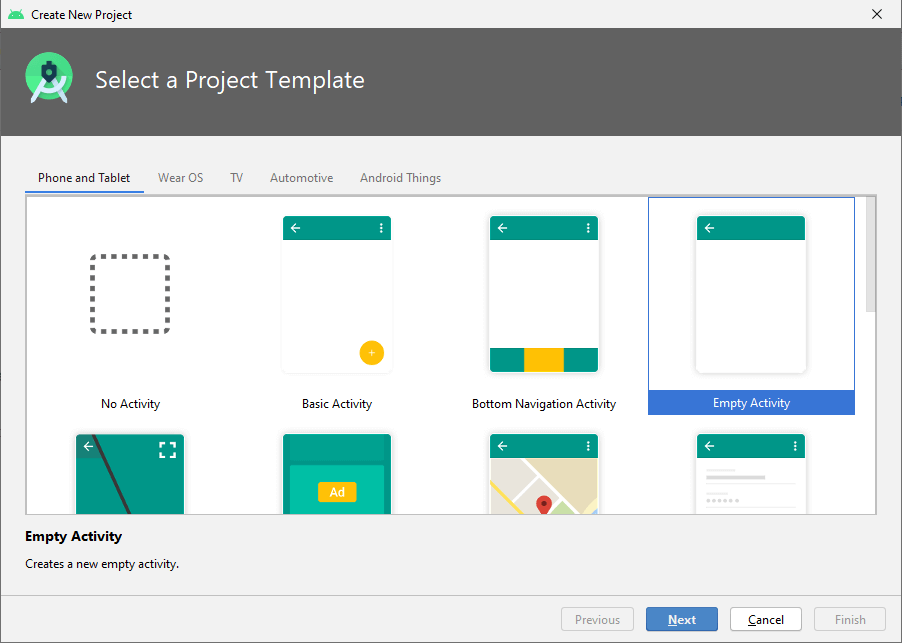
Select Empty Activity and click on Next:
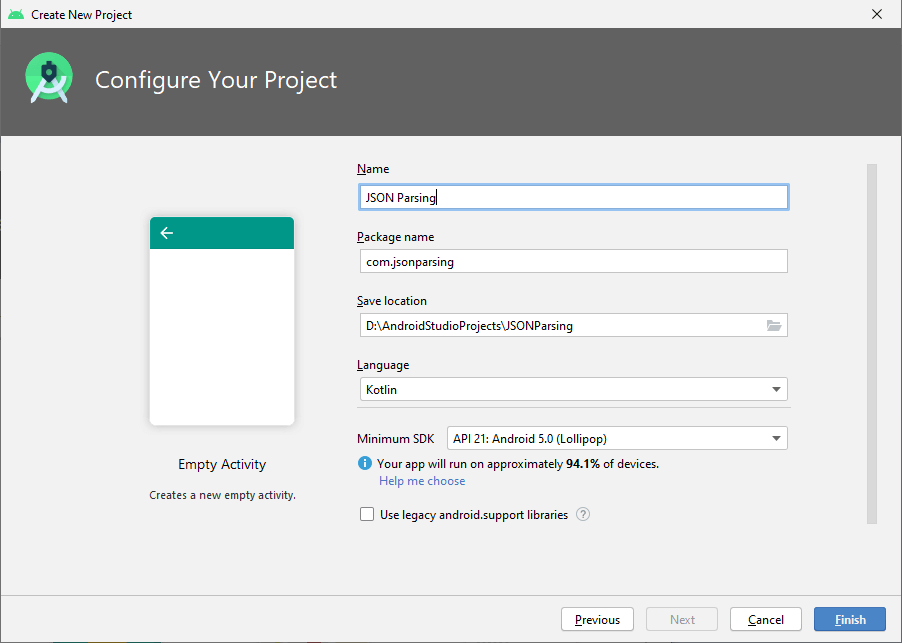
Name the project as you want and update the package name. I have named the project as JSON Parsing and also updated the package name as com.jsonparsing. And also, select the project location where you want to save the project.
Create the project using Kotlin.
In this demo project, I will show you how to create the JSON file in the assets folder. Parse the JSON file using the functions that you have learned in the above article and also using the third party library “GSON”.
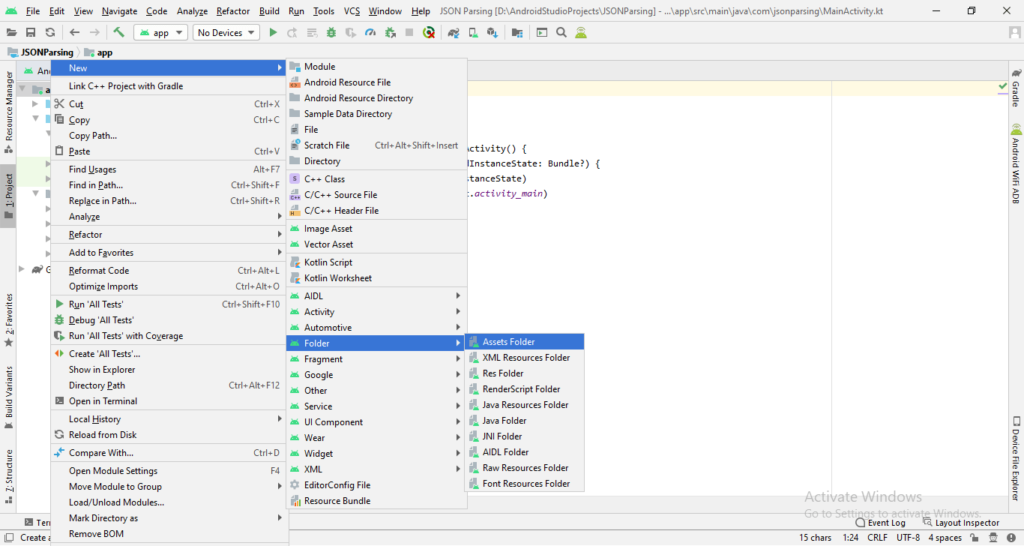
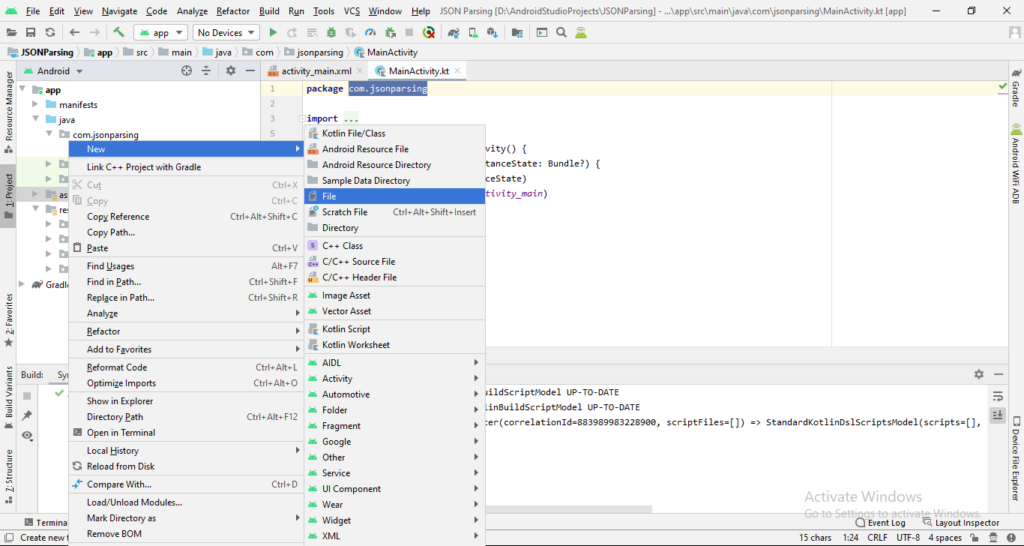
Now, write JSON in the assets folder. This is how you can do it as Go to > app > Right-click on the app and select the New > Folder > Assets Folder > click on Finish. You will see the Assets Folder beneath the java folder in the structure.
After creating the Assets Folder create a JSON file and write your JSON value in it.
I have the JSON example of the list of users with their details as below:
{
  "users": [
    {
      "id": 1,
      "name": "Denis Panjuta",
      "email": "denis@gmail.com",
      "gender": "Male",
      "weight": 75.5,
      "height": 182,
      "phone": {
        "mobile": "0000000000",
        "office": "00000000"
      }
    },
    {
      "id": 2,
      "name": "Jan Smith",
      "email": "jsmith@gmail.com",
      "gender": "Male",
      "weight": 77.0,
      "height": 183,
      "phone": {
        "mobile": "0000000000",
        "office": "00000000"
      }
    },
    {
      "id": 3,
      "name": "Marie",
      "email": "marie@gmail.com",
      "gender": "Female",
      "weight": 68.7,
      "height": 175,
      "phone": {
        "mobile": "0000000000",
        "office": "00000000"
      }
    },
    {
      "id": 4,
      "name": "Paul",
      "email": "paul@gmail.com",
      "gender": "Male",
      "weight": 62.3,
      "height": 174,
      "phone": {
        "mobile": "0000000000",
        "office": "00000000"
      }
    }
  ]
}
Now let’s use the JSON file. Right-click on the Assets folder > New > File and Name the file with extension .json as I have named it as Users.json.
Now copy the above JSON value in the Users.json file and Save it.
Now we have the data of Users in the form of JSON. Which includes id, name, and other details of “user” in it. Let’s use it in the example.
The form you have selected does not exist.
The form you have selected does not exist.
Now, I will show you how to parse it and display the list of Users in the RecyclerView.
Add the below dependency to your app-level build.gradle file to use RecyclerView
    // Material Library
    implementation 'com.google.android.material:material:1.2.0'
Add the RecyclerView in the activity_main.xml as below:
<?xml version="1.0" encoding="utf-8"?>
<androidx.constraintlayout.widget.ConstraintLayout xmlns:android="http://schemas.android.com/apk/res/android"
    xmlns:app="http://schemas.android.com/apk/res-auto"
    xmlns:tools="http://schemas.android.com/tools"
    android:layout_width="match_parent"
    android:layout_height="match_parent"
    android:background="#EEEEEE"
    tools:context=".MainActivity">

    <androidx.recyclerview.widget.RecyclerView
        android:id="@+id/rvUsersList"
        android:layout_width="match_parent"
        android:layout_height="match_parent"
        app:layout_constraintBottom_toBottomOf="parent"
        app:layout_constraintLeft_toLeftOf="parent"
        app:layout_constraintRight_toRightOf="parent"
        app:layout_constraintTop_toTopOf="parent"/>

</androidx.constraintlayout.widget.ConstraintLayout>
Now let’s create the custom item layout for the user to use it in the RecyclerView.
Create a Custom Layout file for RecyclerView
item_user_layout.xml
<?xml version="1.0" encoding="utf-8"?>
<androidx.cardview.widget.CardView xmlns:android="http://schemas.android.com/apk/res/android"
    xmlns:app="http://schemas.android.com/apk/res-auto"
    xmlns:tools="http://schemas.android.com/tools"
    android:layout_width="match_parent"
    android:layout_height="wrap_content"
    android:layout_margin="16dp"
    app:cardCornerRadius="15dp">

    <LinearLayout
        android:layout_width="match_parent"
        android:layout_height="wrap_content"
        android:orientation="vertical"
        android:padding="12dp">

        <LinearLayout
            android:layout_width="match_parent"
            android:layout_height="wrap_content"
            android:orientation="horizontal">

            <TextView
                android:layout_width="wrap_content"
                android:layout_height="wrap_content"
                android:layout_marginEnd="5dp"
                android:text="ID : "
                android:textColor="@color/colorPrimary"
                android:textSize="16sp"
                android:textStyle="bold" />

            <TextView
                android:id="@+id/tv_id"
                android:layout_width="0dp"
                android:layout_height="wrap_content"
                android:layout_weight="1"
                android:textColor="@android:color/black"
                android:textSize="14sp"
                tools:text="User Id" />
        </LinearLayout>

        <LinearLayout
            android:layout_width="match_parent"
            android:layout_height="wrap_content"
            android:orientation="horizontal">

            <TextView
                android:layout_width="wrap_content"
                android:layout_height="wrap_content"
                android:layout_marginEnd="5dp"
                android:text="Name : "
                android:textColor="@color/colorPrimary"
                android:textSize="16sp"
                android:textStyle="bold" />

            <TextView
                android:id="@+id/tv_name"
                android:layout_width="0dp"
                android:layout_height="wrap_content"
                android:layout_weight="1"
                android:textColor="@android:color/black"
                android:textSize="14sp"
                tools:text="User Name" />
        </LinearLayout>

        <LinearLayout
            android:layout_width="match_parent"
            android:layout_height="wrap_content"
            android:orientation="horizontal">

            <TextView
                android:layout_width="wrap_content"
                android:layout_height="wrap_content"
                android:layout_marginEnd="5dp"
                android:text="Email : "
                android:textColor="@color/colorPrimary"
                android:textSize="16sp"
                android:textStyle="bold" />

            <TextView
                android:id="@+id/tv_email"
                android:layout_width="0dp"
                android:layout_height="wrap_content"
                android:layout_weight="1"
                android:textColor="@android:color/black"
                android:textSize="14sp"
                tools:text="User Email" />
        </LinearLayout>

        <LinearLayout
            android:layout_width="match_parent"
            android:layout_height="wrap_content"
            android:orientation="horizontal">

            <TextView
                android:layout_width="wrap_content"
                android:layout_height="wrap_content"
                android:layout_marginEnd="5dp"
                android:text="Gender : "
                android:textColor="@color/colorPrimary"
                android:textSize="16sp"
                android:textStyle="bold" />

            <TextView
                android:id="@+id/tv_gender"
                android:layout_width="0dp"
                android:layout_height="wrap_content"
                android:layout_weight="1"
                android:textColor="@android:color/black"
                android:textSize="14sp"
                tools:text="User Gender" />
        </LinearLayout>

        <LinearLayout
            android:layout_width="match_parent"
            android:layout_height="wrap_content"
            android:orientation="horizontal">

            <TextView
                android:layout_width="wrap_content"
                android:layout_height="wrap_content"
                android:layout_marginEnd="5dp"
                android:text="Weight : "
                android:textColor="@color/colorPrimary"
                android:textSize="16sp"
                android:textStyle="bold" />

            <TextView
                android:id="@+id/tv_weight"
                android:layout_width="0dp"
                android:layout_height="wrap_content"
                android:layout_weight="1"
                android:textColor="@android:color/black"
                android:textSize="14sp"
                tools:text="User Weight" />
        </LinearLayout>

        <LinearLayout
            android:layout_width="match_parent"
            android:layout_height="wrap_content"
            android:orientation="horizontal">

            <TextView
                android:layout_width="wrap_content"
                android:layout_height="wrap_content"
                android:layout_marginEnd="5dp"
                android:text="Height : "
                android:textColor="@color/colorPrimary"
                android:textSize="16sp"
                android:textStyle="bold" />

            <TextView
                android:id="@+id/tv_height"
                android:layout_width="0dp"
                android:layout_height="wrap_content"
                android:layout_weight="1"
                android:textColor="@android:color/black"
                android:textSize="14sp"
                tools:text="User Height" />
        </LinearLayout>

        <LinearLayout
            android:layout_width="match_parent"
            android:layout_height="wrap_content"
            android:orientation="horizontal">

            <TextView
                android:layout_width="wrap_content"
                android:layout_height="wrap_content"
                android:layout_marginEnd="5dp"
                android:text="Mobile Number : "
                android:textColor="@color/colorPrimary"
                android:textSize="16sp"
                android:textStyle="bold" />

            <TextView
                android:id="@+id/tv_mobile"
                android:layout_width="0dp"
                android:layout_height="wrap_content"
                android:layout_weight="1"
                android:textColor="@android:color/black"
                android:textSize="14sp"
                tools:text="User Mobile Number" />
        </LinearLayout>

        <LinearLayout
            android:layout_width="match_parent"
            android:layout_height="wrap_content"
            android:orientation="horizontal">

            <TextView
                android:layout_width="wrap_content"
                android:layout_height="wrap_content"
                android:layout_marginEnd="5dp"
                android:text="Office Number : "
                android:textColor="@color/colorPrimary"
                android:textSize="16sp"
                android:textStyle="bold" />

            <TextView
                android:id="@+id/tv_office_number"
                android:layout_width="0dp"
                android:layout_height="wrap_content"
                android:layout_weight="1"
                android:textColor="@android:color/black"
                android:textSize="14sp"
                tools:text="User Office Number" />
        </LinearLayout>

    </LinearLayout>
</androidx.cardview.widget.CardView>
Create a User Data Model Class
This Data Model class is basically mirroring the data that we have in JSON format. Can you see how the names of our variables are the same as the names of properties in the JSON file? This is important for the process to work.
//Creating a data model class for User
class UserModelClass(
    val id: Int,
    val name: String,
    val email: String,
    val gender: String,
    val weight: Double,
    val height: Int,
    val mobile: String,
    val office: String
)
Create a User Adapter Class
class UserAdapter(val context: Context, val items: ArrayList<UserModelClass>) :
    RecyclerView.Adapter<UserAdapter.ViewHolder>() {

    /**
     * Inflates the item views which is designed in xml layout file
     *
     * create a new
     * {@link ViewHolder} and initializes some private fields to be used by RecyclerView.
     */
    override fun onCreateViewHolder(parent: ViewGroup, viewType: Int): ViewHolder {
        return ViewHolder(
            LayoutInflater.from(context).inflate(
                R.layout.item_user_layout,
                parent,
                false
            )
        )
    }

    /**
     * Binds each item in the ArrayList to a view
     *
     * Called when RecyclerView needs a new {@link ViewHolder} of the given type to represent
     * an item.
     *
     * This new ViewHolder should be constructed with a new View that can represent the items
     * of the given type. You can either create a new View manually or inflate it from an XML
     * layout file.
     */
    override fun onBindViewHolder(holder: ViewHolder, position: Int) {

        val item = items.get(position)

        holder.tvId.text = item.id.toString()
        holder.tvName.text = item.name
        holder.tvEmail.text = item.email
        holder.tvGender.text = item.gender
        holder.tvWeight.text = item.weight.toString()
        holder.tvHeight.text = item.height.toString()
        holder.tvMobileNumber.text = item.mobile
        holder.tvOfficeNumber.text = item.office
    }

    /**
     * Gets the number of items in the list
     */
    override fun getItemCount(): Int {
        return items.size
    }

    /**
     * A ViewHolder describes an item view and metadata about its place within the RecyclerView.
     */
    class ViewHolder(view: View) : RecyclerView.ViewHolder(view) {
        // Holds the TextView that will add each item to
        val tvId = view.tv_id
        val tvName = view.tv_name
        val tvEmail = view.tv_email
        val tvGender = view.tv_gender
        val tvWeight = view.tv_weight
        val tvHeight = view.tv_height
        val tvMobileNumber = view.tv_mobile
        val tvOfficeNumber = view.tv_office_number
    }
}
JSON parsing from JSON file and Attach the adapter to the RecyclerView
Now, Get the JSON file’s values and then the user values to the UserAdapter class to put that values on the RecyclerView. Go to the MainActivity.kt file and add the below code:
MainActivity.kt
class MainActivity : AppCompatActivity() {

    override fun onCreate(savedInstanceState: Bundle?) {
        super.onCreate(savedInstanceState)
        setContentView(R.layout.activity_main)

        // Instance of users list using the data model class.
        val usersList: ArrayList<UserModelClass> = ArrayList()

        try {
            // As we have JSON object, so we are getting the object
            //Here we are calling a Method which is returning the JSON object
            val obj = JSONObject(getJSONFromAssets()!!)
            // fetch JSONArray named users by using getJSONArray
            val usersArray = obj.getJSONArray("users")
            // Get the users data using for loop i.e. id, name, email and so on

            for (i in 0 until usersArray.length()) {
                // Create a JSONObject for fetching single User's Data
                val user = usersArray.getJSONObject(i)
                // Fetch id store it in variable
                val id = user.getInt("id")
                val name = user.getString("name")
                val email = user.getString("email")
                val gender = user.getString("gender")
                val weight = user.getDouble("weight")
                val height = user.getInt("height")

                // create a object for getting phone numbers data from JSONObject
                val phone = user.getJSONObject("phone")
                // fetch mobile number
                val mobile = phone.getString("mobile")
                // fetch office number
                val office = phone.getString("office")

                // Now add all the variables to the data model class and the data model class to the array list.
                val userDetails =
                    UserModelClass(id, name, email, gender, weight, height, mobile, office)

                // add the details in the list
                usersList.add(userDetails)
            }
        } catch (e: JSONException) {
            //exception
            e.printStackTrace()
        }

        // Set the LayoutManager that this RecyclerView will use.
        rvUsersList.layoutManager = LinearLayoutManager(this)
        // Adapter class is initialized and list is passed in the param.
        val itemAdapter = UserAdapter(this, usersList)
        // adapter instance is set to the recyclerview to inflate the items.
        rvUsersList.adapter = itemAdapter

    }


    /**
     * Method to load the JSON from the Assets file and return the object
     */
    private fun getJSONFromAssets(): String? {

        var json: String? = null
        val charset: Charset = Charsets.UTF_8
        try {
            val myUsersJSONFile = assets.open("Users.json")
            val size = myUsersJSONFile.available()
            val buffer = ByteArray(size)
            myUsersJSONFile.read(buffer)
            myUsersJSONFile.close()
            json = String(buffer, charset)
        } catch (ex: IOException) {
            ex.printStackTrace()
            return null
        }
        return json
    }
}
Now, run the application and see the output.
Output
As you can see all the detail of the JSON object is parsed and displayed in the RecyclerView with the individual user details.
JSON parsing using GSON
Now, you have seen the JSON parsing with the functions and which we need to do it manually line by line.
Here I will show you how to do it with a third-party library. There are many libraries that are used to parse JSON objects with the help of the data model class.
I will show you the third party library GSON which is quite popular. You can check out the link for more details.
Add the below dependency to your app-level build.gradle file to use GSON.
implementation 'com.google.code.gson:gson:2.8.6'
Now update the data model class as below:
Update the Data Model Class
//Creating a data model class for User
data class Users(
    val users: ArrayList<UserModelClass>
)

data class UserModelClass(
    val id: Int,
    val name: String,
    val email: String,
    val gender: String,
    val weight: Double,
    val height: Int,
    val phone: Phone
)

data class Phone(
    val mobile: String,
    val office: String
)
Update the User Adapter
After updating the data model class. You need to update these two lines in the onBindViewHolder method.
holder.tvMobileNumber.text = item.phone.mobile
holder.tvOfficeNumber.text = item.phone.office
Update the MainActivity.kt using GSON
Update the MainActivity.kt as below:
class MainActivity : AppCompatActivity() {

    override fun onCreate(savedInstanceState: Bundle?) {
        super.onCreate(savedInstanceState)
        setContentView(R.layout.activity_main)

        // Instance of users list using the data model class.
        // val usersList: ArrayList<UserModelClass> = ArrayList()

        try {
            val jsonString = getJSONFromAssets()!!
            val users = Gson().fromJson(jsonString, Users::class.java)

            /*// As we have JSON object, so we are getting the object
            //Here we are calling a Method which is returning the JSON object
            val obj = JSONObject(getJSONFromAssets()!!)
            // fetch JSONArray named users by using getJSONArray
            val usersArray = obj.getJSONArray("users")
            // Get the users data using for loop i.e. id, name, email and so on

            for (i in 0 until usersArray.length()) {
                // Create a JSONObject for fetching single User's Data
                val user = usersArray.getJSONObject(i)
                // Fetch id store it in variable
                val id = user.getInt("id")
                val name = user.getString("name")
                val email = user.getString("email")
                val gender = user.getString("gender")
                val weight = user.getDouble("weight")
                val height = user.getInt("height")

                // create a object for getting phone numbers data from JSONObject
                val phone = user.getJSONObject("phone")
                // fetch mobile number
                val mobile = phone.getString("mobile")
                // fetch office number
                val office = phone.getString("office")

                // Now add all the variables to the data model class and the data model class to the array list.
                val userDetails =
                    UserModelClass(id, name, email, gender, weight, height, mobile, office)

                // add the details in the list
                usersList.add(userDetails)
            }*/

            // Set the LayoutManager that this RecyclerView will use.
            rvUsersList.layoutManager = LinearLayoutManager(this)
            // Adapter class is initialized and list is passed in the param.
            val itemAdapter = UserAdapter(this, users.users)
            // adapter instance is set to the recyclerview to inflate the items.
            rvUsersList.adapter = itemAdapter
        } catch (e: JSONException) {
            //exception
            e.printStackTrace()
        }
    }


    /**
     * Method to load the JSON from the Assets file and return the object
     */
    private fun getJSONFromAssets(): String? {

        var json: String? = null
        val charset: Charset = Charsets.UTF_8
        try {
            val myUsersJSONFile = assets.open("Users.json")
            val size = myUsersJSONFile.available()
            val buffer = ByteArray(size)
            myUsersJSONFile.read(buffer)
            myUsersJSONFile.close()
            json = String(buffer, charset)
        } catch (ex: IOException) {
            ex.printStackTrace()
            return null
        }
        return json
    }
}
Now, if you have noticed the JSON parsing using the function is just reduced to one line after updating the data model class as per the JSON string.
Run the application and see the output after changing the number of lines to one.
Output
It is the same as above but using the GSON library.
Summary
In this article, you have learned about the JSON parsing in Android with functions and with third party library GSON.
The form you have selected does not exist.
The form you have selected does not exist.