

Sponsored by Qonversion.io.
What are we going to build and what is Qonversion
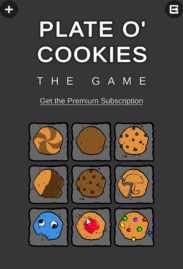
So what are we going to build?
The game itself consists of a simple Cookie clicker game.

Each time you click, the number goes up by one. Simple enough. Every 30 seconds, for testing purposes, we get an ad.
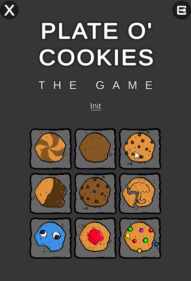
We´ll have a button in our main menu where we can click to subscribe to remove ads from our app.
This will call a Qonversion Purchase method to buy the subscription we set up on there and on the play store.
A permission check is done and ads stop being displayed if a valid subscription is detected.
Also, as a bonus, we can purchase Cookie skins to change the look of our clickable cookie
Eveything also set up through the Qonversion SDK.
Speaking of, what actually is Qonversion.io?
Let´s get a more in depth look at them and why they are going to be so useful for today´s project.
Qonversion.io is a platform to implement, manage and analize your In app purchases in a way more streamlined and simple way.
Mainly focused on Mobile Development it offers direct implementation of Google Play Store and Apple App Store IAP´s and subscription plans.
So, getting In app purchases to work through the traditional way of directly using the Google play billing library brings a big amount of work with it. From validating data, to managing renewals and cancelations or preventing fraud and supervising your analytics to know how your app is performing like. Usually this asks for a huge time investment on the development side.
But here you just need to set them up on Qonversion, add the id from Google and Apple and showing them in your app is just a single method away.
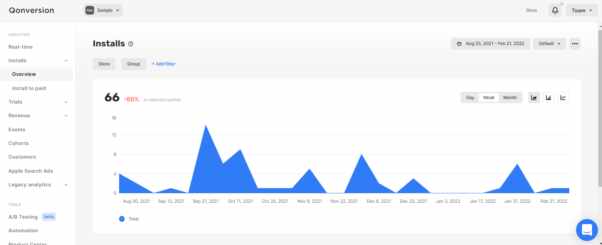
Out-of-the-box server-side receipt validation provides you with 100% accurate data about subscription events. In Qonversion dashboard you can see your revenue, trials, renewal, refunds and other crucial metrics and even send it to your favorite 3rd party marketing tools .
We even get features like A/B testing where you can directly compare your products with one another to see wich one performs better, so showing one product to some of your users and another, slightly different one to the rest. A really good and quick way to optimize your earnings.

Automation tool helps you to send personalized push notifications generated by user’s behavior – you can suggest a trial or discount or simply ask why the person wants to leave. It helps to return lapsed customers.
Let´s get to it then. To be able to follow along you will need to create an account on their website but don´t worry that Qonversion is totally free to start.
Great, let´s start!
Preparing the Cookie Clicker game
Let´s start setting up a simple Cookie clicker game for our project
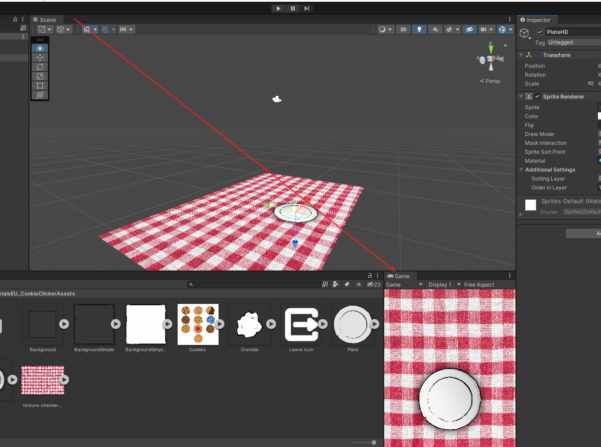
Create a new 2D project in Unity 2021.2.8f1 and call it CookieClicker

Add the TutorialsEU Cookie Clicker Assets to your project
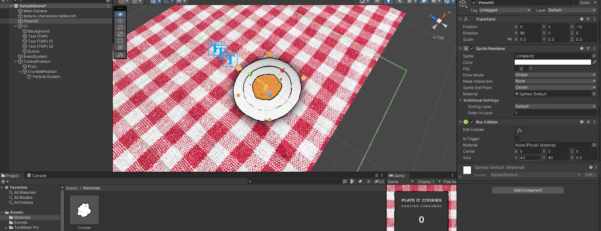
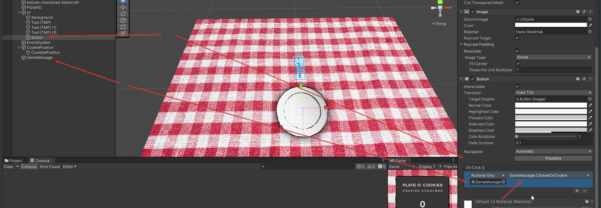
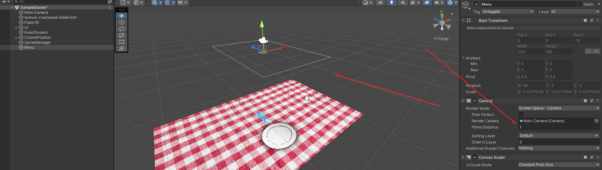
Set your table cloth texture as a base in scene at position 0,0,-9, scale 0.4 and rotation -90 0 0, so to place it looking up.
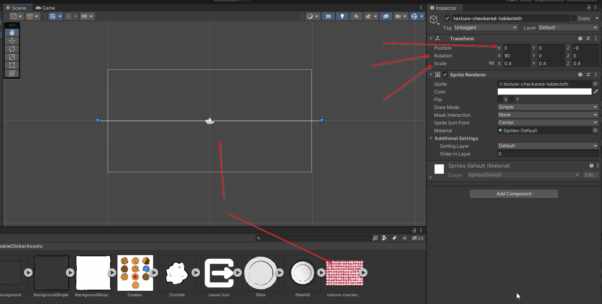
We won´t see it at first, that is just because we need our camera to look down instead of straighforward. We do this to be able to make use of gravity for the particle physics later on.
To be able to see it, go to the 3D view and position the camera to 0,10,-10 with rotation 90
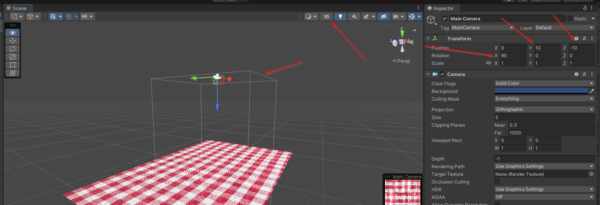
Place a plate on the table at position 0,0,-12 , scale 0.3 and rotation 90 and set the order in layer to 1
By the way, to always get a preview of about how your game will look like in a mobile format, dock your game view to the bottom right here.
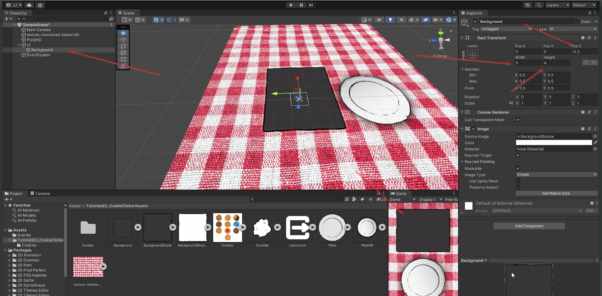
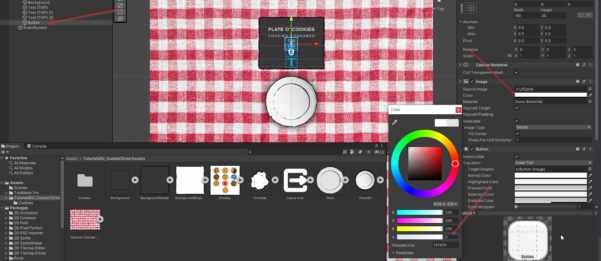
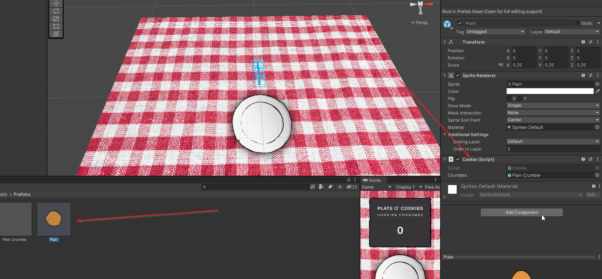
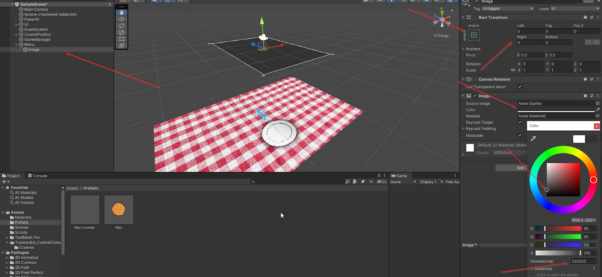
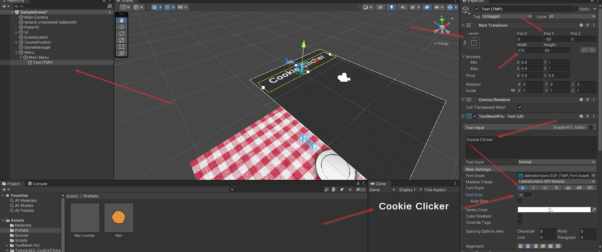
Now, let´s set up an in game UI element. Just where our clicks are shown
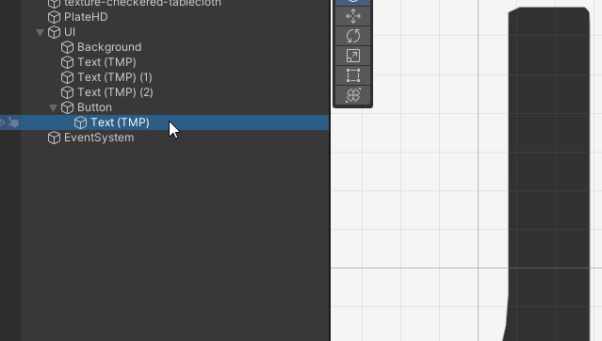
Create a Canvas and call UI, set it to World Space and add the camera to it
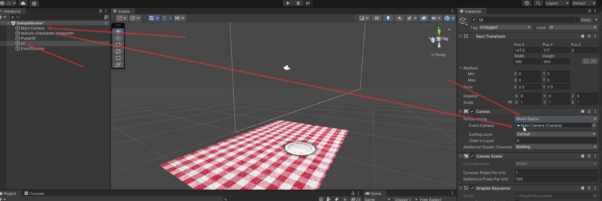
Position it at 0,0,-7.5. Width 1 and Height 1. And rotation 90
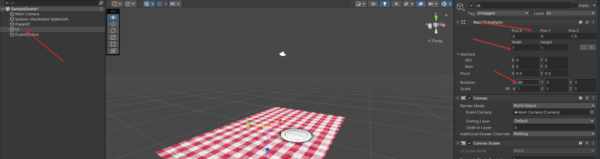
Add an Image and call it Background
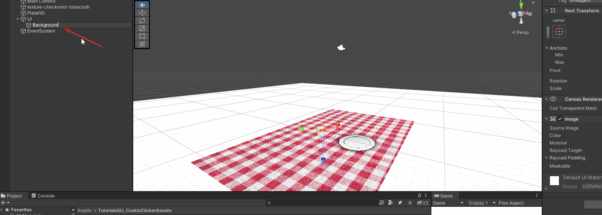
Change the image to the BackgroundSimple Asset
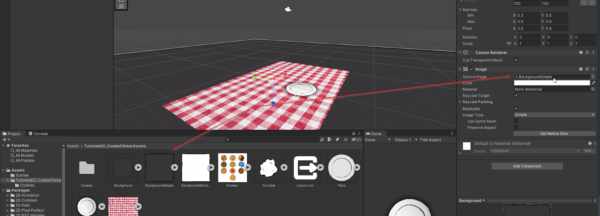
Set it´s dimensions to Pos 0,0,-0.5 Width 5 and Height 4
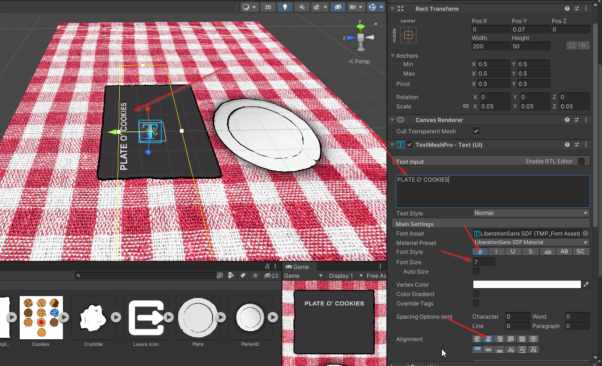
Now, add a TextMeshPro text, for that you will need to download TMP essentials, but as soon as you try adding it it will prompt you with this
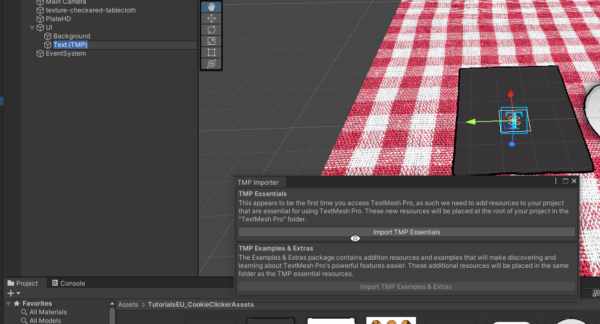
So just click on Import and you can use it
Now set the text to position 0,0.7,0 and the scale to 0.05
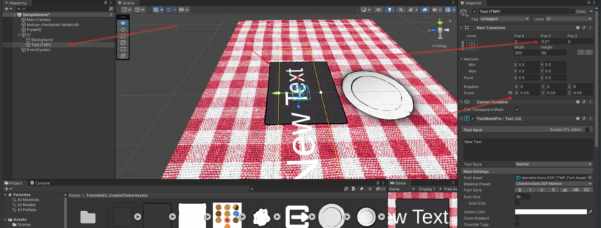
We change the scale so we can use normal font numbers for the font size, since if we didn´t do that font size would allways be in the 0.x range.
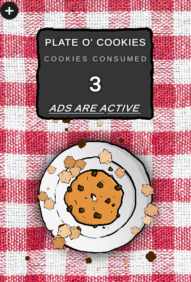
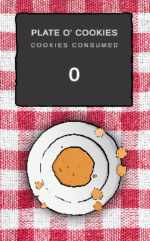
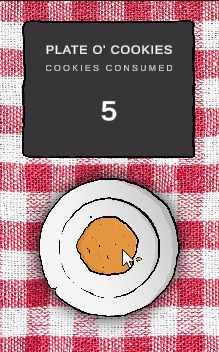
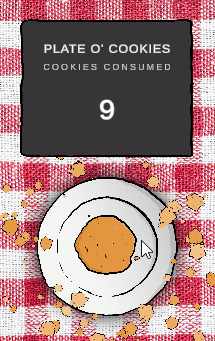
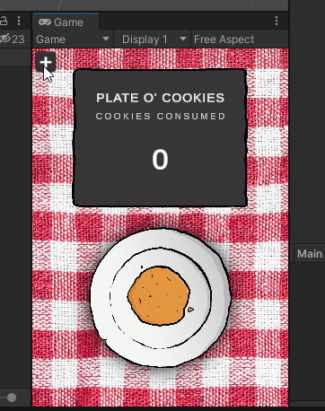
Now change that font size to 7, set it to Bold, alignment center and type the title of your game, this one is going to be Plate O’ Cookies
Now duplicate, move down -0.5, font size 5, not bold, and character spacing 25. And type, “cookies consumed” for example
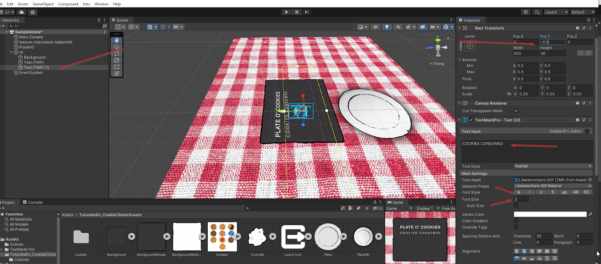
Duplicate again, move down to -1.4, font size 16, no character space, Bold and type a “0”. This is where our amount of cookies clicked is going to be shown through code
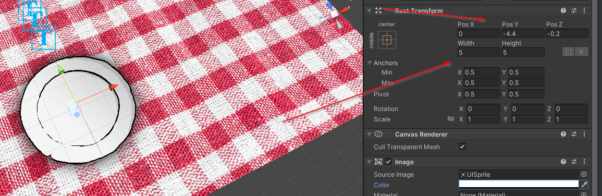
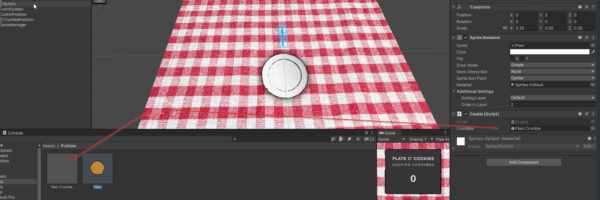
Now add a button on top of the plate which we will be using as the clicking button. Text can be deleted
And Image opacity changed to 0.
Then change pos to 0,-4.4,-0.2 Width 5 and height 5
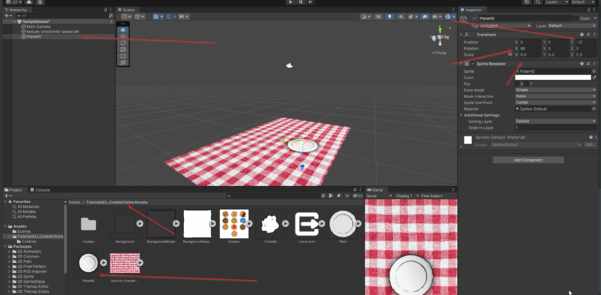
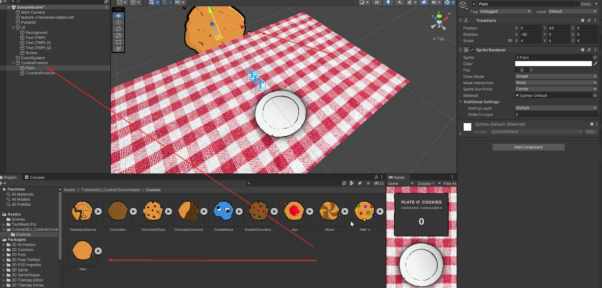
Great, now set up where the cookie is going to be spawned.
Create a new empty called CookiePosition and set it to 0,0,-12 Rot 90 0 0

Inside, another empty called crumbleposition at po 0,0,-1 rot -90. For where the Particles are going to spawn

Great, to be able to make our first play test, let´s set up the clicking and initialization of our game before adding any Menu to it.
So let´s start just that by preparring our initial cookie.
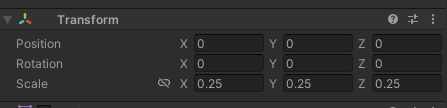
Drag in our plain cookie
Completelly reset and order in layer 2
And Scale 0.25
Now, let´s set up some simple Particle effects.
Adding simple particles
Now, let´s set up some simple Particle effects.
Create a new Particle system inside Crumble position
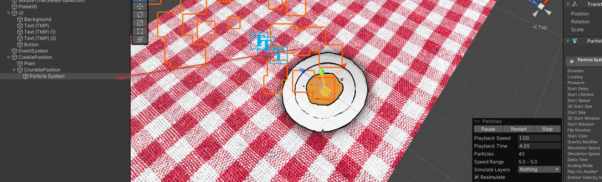
Start by setting it at reset pos in case it isn´t. Then the Particle system settings are
Duration 0.2
Looping false
Start Lifetime 10
Start Speed 5 – 15
Start Size 0.1 – 0.8
Start color E4953F – F8C895
Gravity modifier 10
Gravity Space World

Then for the Emission set to 50

Shape will be Cone
Angle 25
Radius 1.8
Radius Thickness 0.55

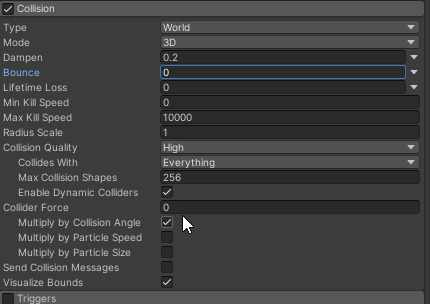
Collision to World
Dampen 0.2
Bounce 0
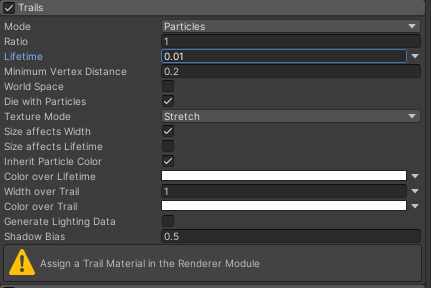
Add trails with a lifetime of 0.01
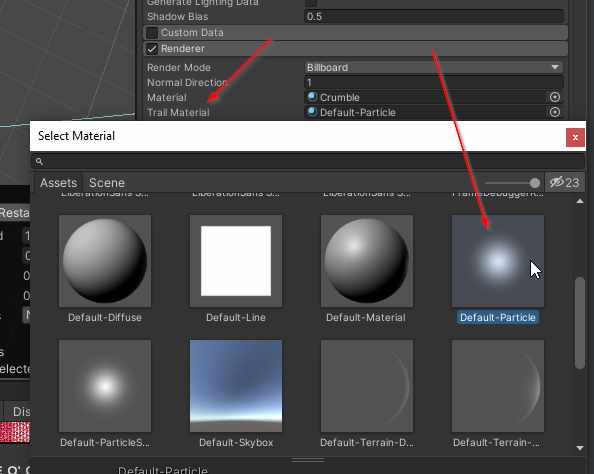
And in the renderer
we´ll need a new material, set up in the Assets folder a new Materials folder
Create a material and set to Particles/Standard Unlit, rendering Mode Cutout, And add the crumble texture in the albedo
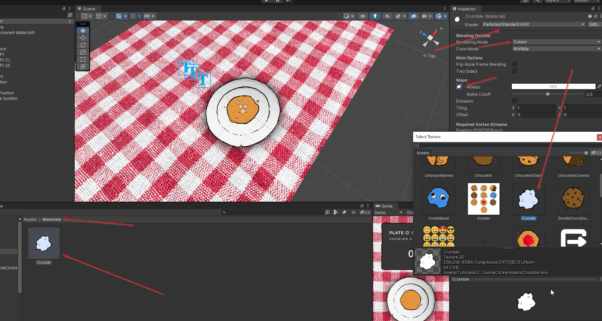
Back in the Particle System Renderer, add the new material to the Material slot
And Default particle to the trail Material
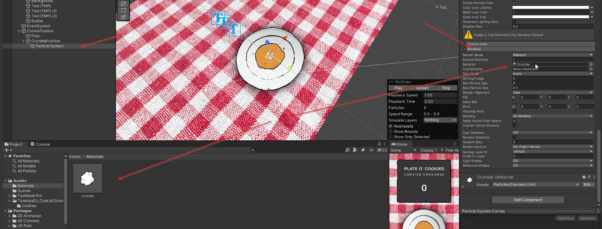
Great, only issue left is that they just fall throught hetable and plate, we want them to stay
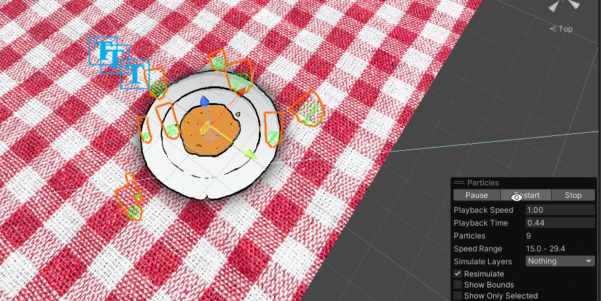
So for that just add a box collider to the plate and double the width
Looking good so far
The GameManager for the Cookie Clicker game
Let´s start setting up the GameManager now
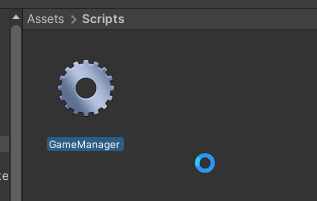
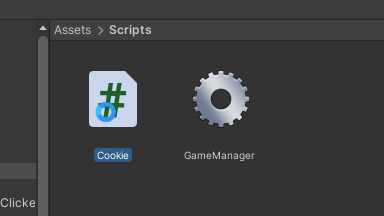
Create a new Script called GameManager inside a new Scripts Folder
For the spawning first, we will need a reference to what we want to spawn and where
|
public class GameManager : MonoBehaviour |
Then, create a SpawnCookie method that takes a GameObject
|
public void SpawnCookie(GameObject cookie) |
In there, just instantiate at cookie position
|
public void SpawnCookie(GameObject cookie) } |
And call in the Start method
|
void Start() |
That should spawn our cookie.
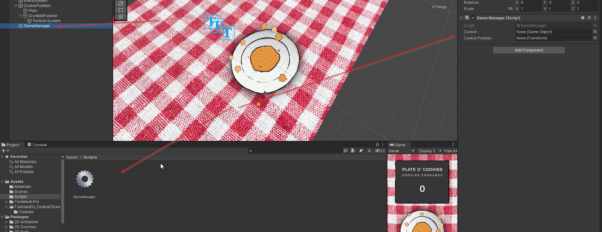
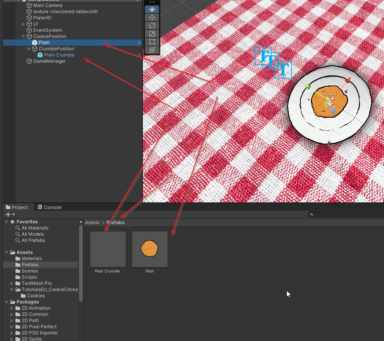
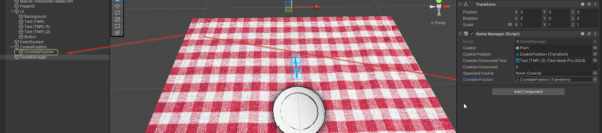
Now in the editor, create a new empty and add the GameManager script to it
Now, in a new Prefabs Folder, drag in our Cookie to create a prefab out of it. Make one from the particles as well already
Delete them from the Hierarchy
And add the cookie prefab to the GameManager cookie field and the cookie position to the cookie position field
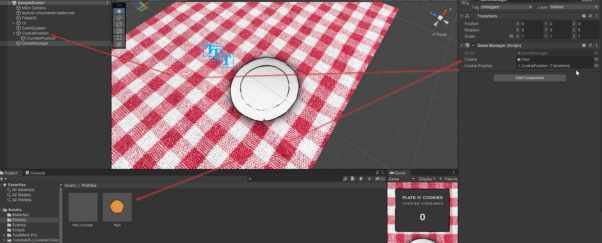
And we should see it spawn
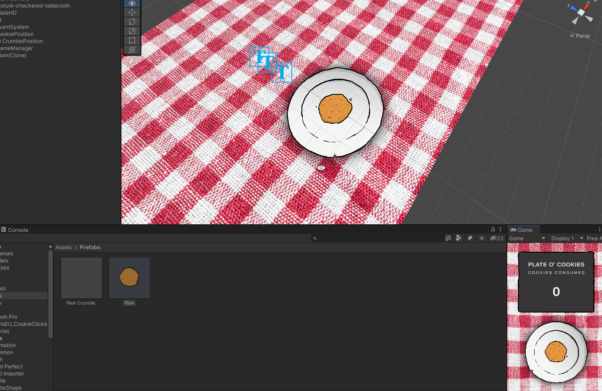
Now, let´s make it clickable and spawn crumbs
Create a new method ClickedOnCookie()
|
public void ClickedOnCookie() |
Add two new variables for the cookie clicked amount number
|
public class GameManager : MonoBehaviour |
Control + Dot on the TextmeshProGUI var name to add the using tag
|
using System.Collections; |
And in the new method add one to cookiesConsumed and set it in the text
|
public void ClickedOnCookie() |
Also, just to make sure, initialize the cookiesConsumed number and field in Start()
|
void Start() |
Add the right text element in the new field

Call the method through the button we set up earlier
And the result is, succesful!
Let´s spawn the particles now,
To have a reference to the particles that this specific cookie has, we´ll need to create a script that´ll hold the specific Particle prefab, that way when we´ll add a new cookie, we can just easily swap those out without any issue.
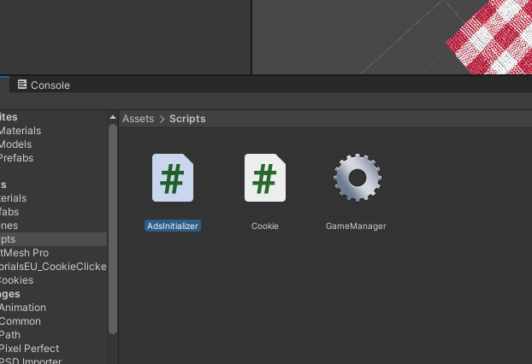
So create a new script called Cookie
Add this GameObject var to it
|
public class Cookie : MonoBehaviour |
And then you would just need to fetch that from the GameManager script and instantiate it.
In GameManager create a new Var for the cookie script of the cookie prefab and the crumbleposition
|
public class GameManager : MonoBehaviour |
And make sure to add the cookie script from the spawnedCookie in that var
|
public void SpawnCookie(GameObject cookie) |
And instantiate the crumbs at the position
|
public void ClickedOnCookie() |
Add the crumble position gameobject to the GameManager var
Add the cookie script to the cookie prefab
And the crumbs prefab to the cookie script in the cookie prefab
There we go
Let´s set up the Main menu and then Finally get to adding our Money Makers
Adding a Main Menu
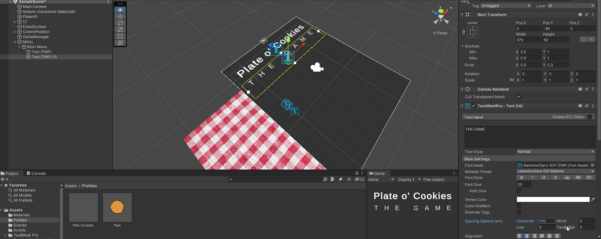
Now on to adding a Menu, start by setting up a second Canvas Object an call it Menu

Set it to Screen Space Camera and Add the Main Camera in there
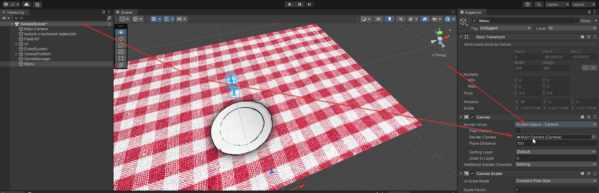
Plane distance can be for example, 1.
Now create a new Image, set it to Stretch and values to 0. Then color to a grey like color. Like #323232
If this happens to you, where another UI element peaks through
Just move the order in layer up, like to 10.
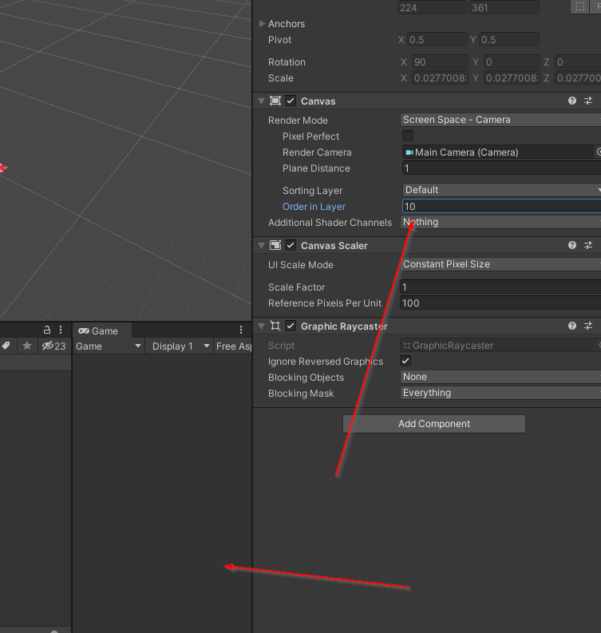
For organization, call the image gameobject something like Main Menu
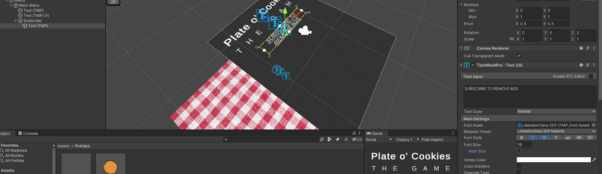
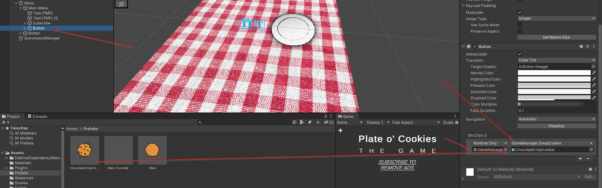
Now inside, create a title textmeshpro object, set it to center top align, -50 Pos Y, 275 Width, Bold and Font size 30. And type in your title!
I also duplicated it and set it as subtitle. You can set it up however you want.
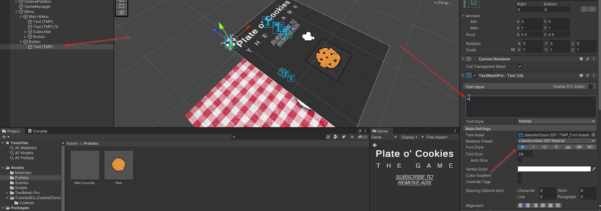
Now make a button, set it to align top, Pos Y -125, Image color alpha to 0, so that the image is not visible.
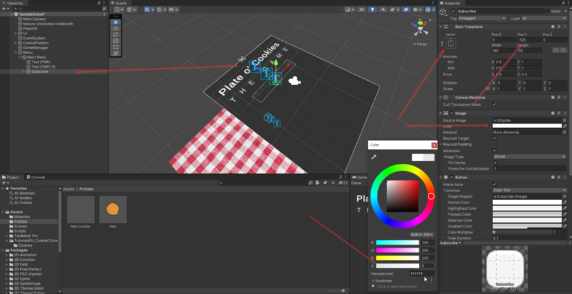
To be able to see the text again, change it´s color to white, font-size to 16, italics and underlined, you can style it however you want. Change the text to a placeholder lke SUBSCRIBE TO REMOVE ADS, We will replace this text in script later on. This will be our subscription button.
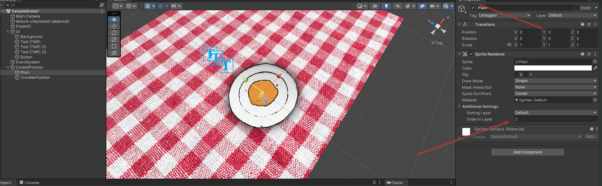
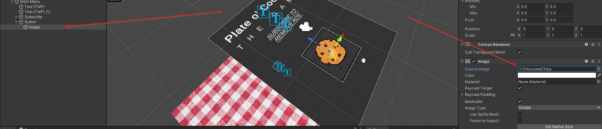
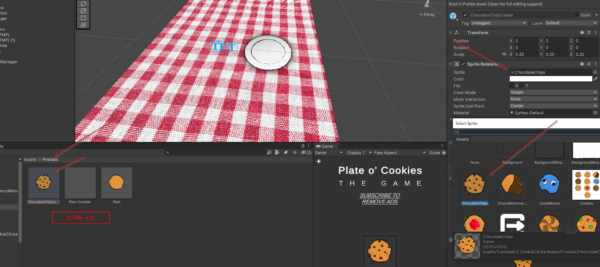
And lastly, to have it for our testing purposes, let´s set up a single cookie skin for now. For that, you´ll just need to create another button, change the Source Image to our simple background, width and height to 100 and move it down to -75.
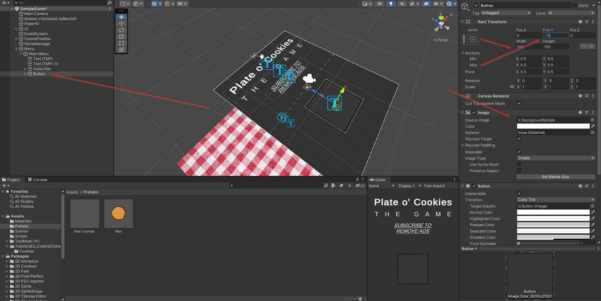
And inside, create an image with one of the cookies as source image so we know which one it is. You can remove the text by the way, since we won´t be needing that.
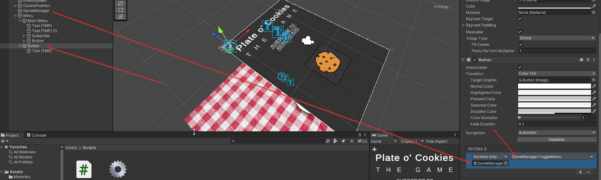
And the very last thing before we start with the back end, a toggle button to toggle the menu on and off.
Just create another button, outside of Main Menu GameObject, and, to keep it as simple as it gets, we´ll mark it being open or closed with a “+” sign or a “x” sign.
So let´s start by creating a button. And setting it to align to the left corner, with a width and height of 25, and a Pos X of 15 Pos Y of -15. Also change the color to the same as our SimpleBackground button color.

Then change the text inside to a plus sign. Bold and color white.
Now, to make it toggle our menu, create a new method toggle menu in our GameManager.cs
|
public void ToggleMenu() |
Disclaimer. It is advised to separate in a different script your menu management and your game management but since this game is just for testing and teaching pupouses, we won´t need to do that. But you should if you intent in making money off of this app.
Now simply just create a var for the main menu gameobject and the toggle icon
|
public class GameManager : MonoBehaviour |
And check if it´s active to deactivate, or inactive to activate. And change the icon itself.
|
public void ToggleMenu() |
Now try it out. Add the method to our button
And the gameobjects to the gamemanager
This should work.
Disable the main menu and try it out.

And it works!

Alright! That´s it for the initial set up. Keep in mind that all of this is just for testing purposes so it may not be the best looking UI out there, if you want us to expand on UI design and UI elements then make sure to subscribe, like and comment that down below and we will make sure to make a video going in depth into UI design in Unity!
Now, let´s finish up our main test game with a cookie swap method.
In your GameManager, set a new void method called SwapCookie
|
public void SwapCookie(GameObject cookie) |
This method gets a gameobject wich will be the prefab of our new ChocolateChipCookie
Inside, we’ll destroy the current spawnedCookie and call the spawnCookie method with the new cookie
|
public void SwapCookie(GameObject cookie) |
Duplicate the cookie prefab and swap the texture to the new cookie
In the editor, add the new method to your cookie button
Now Swapping works flawlessly, we´ll get back to it later to add further functionality to it.
Great, now on to the technical side! Let´s start by setting up our ads!
Adding Unity ADS into our App
Let´s add some Ads into our game. What we will be adding are just skippable ads so to test out the subscription feature, we won’t go over Rewarded ads or further content in this video but if you want to learn more in depth about it, make sure to check out our video on Skippable and Rewarded ADS, link in the description!
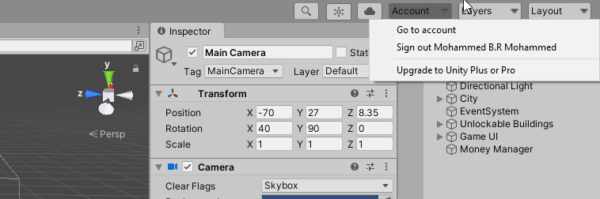
So, first, make sure that you are logged in to your unity account in the editor.
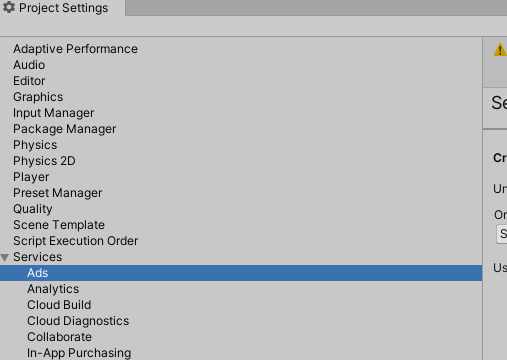
Go to Project Settings→Services→Ads
Then select your organization.
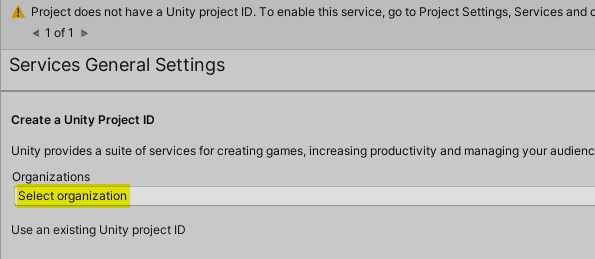
And Create a project ID.

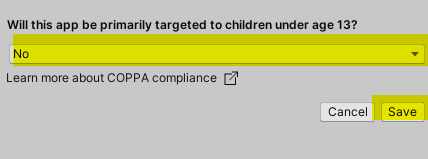
Now you will be asked whether your app is directed towards children younger than 13 years old.
Select No and click Save.
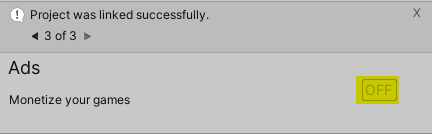
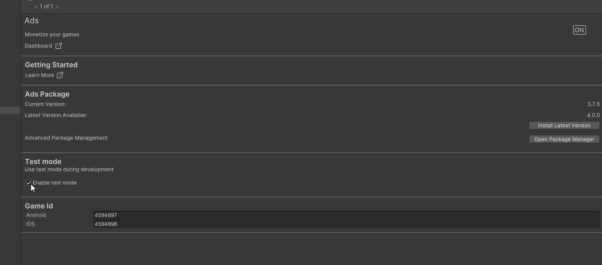
Now the window will change and it will display a button called “Off” which means the ads are not yet turned on.
Click on it to turn it “On”.
Unity will import the ads package.
After it’s done you will see the current version of the package imported.
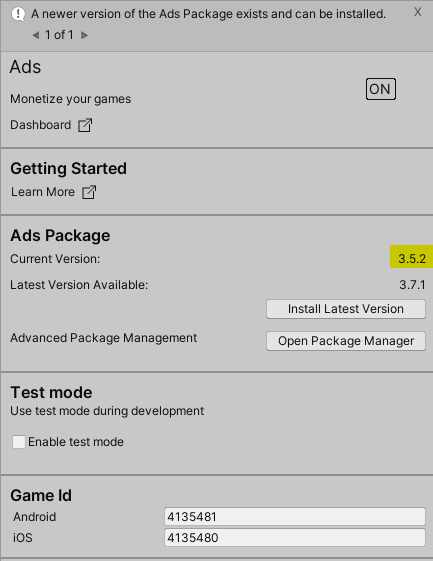
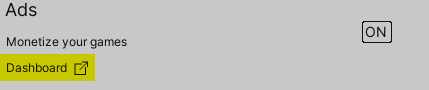
Click on the Dashboard link to open, We will need it for later.
In the dashboard select the project.
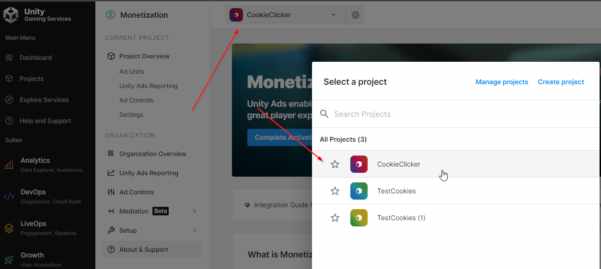
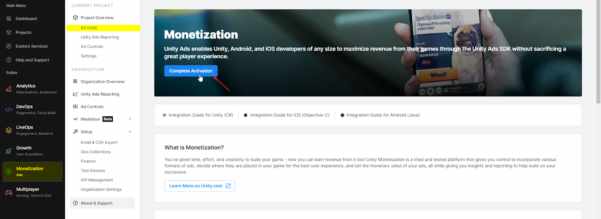
Then select Monetization and Ad units. Click on Complete Activation
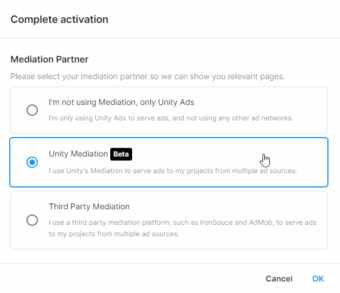
Select Unity Mediation to use Unity to serve us Ads.
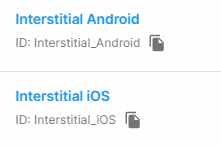
And you´ll be able to see the Unity Ads panel with a your IOS and ANDROID Codes, and also a bunch of premade Ad Units.
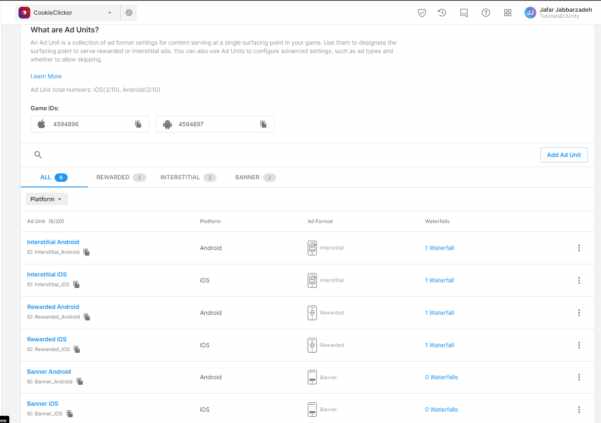
The Game ID should have automatically been added to your Unity Project, if not, make sure to add it now.
Alright. Now let´s initialize the Unity Ads SDK in our Project.
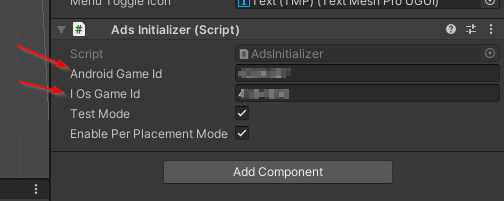
For that, create a new script called AdsInitializer.
Replace the code it contains, with the following
|
using UnityEngine; |
This will initialize you Unity Ads. Add the script to your GameManager GameObject. Or create a new AdsManager Gameobject, whichever you prefer.

And set your Game ID´s
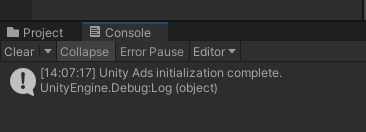
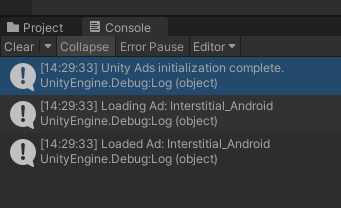
Now run, and you should be getting this Console line.
Nice, now let´s just add a skippable Interstitial ad.
To display a full-screen interstitial ad, use the Load function to load ad content to an Ad Unit and the Show function to show the ad.
In SDK versions 3.7.0 and higher, you can use the IUnityAdsLoadListener and IUnityAdsShowListener callbacks to implement logic for when content succeeds or fails to load or show respectively.
Create a new script called InterstitialAdExample. And replace it´s content with this.
using UnityEngine;
|
using UnityEngine.Advertisements; |
Now just add it to the GameManager GameObject and set the Ad Unity ID´s. 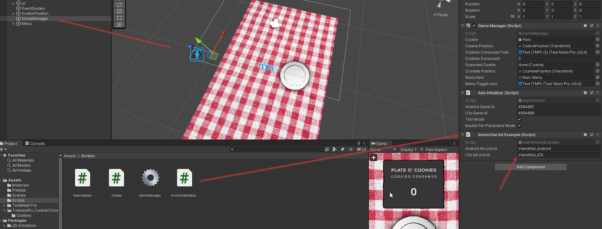
In my case, since I haven´t changed them, they are still the same.
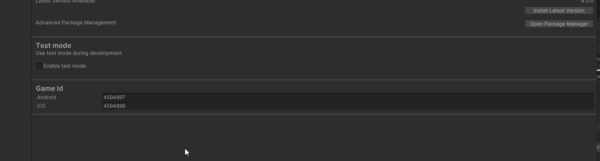
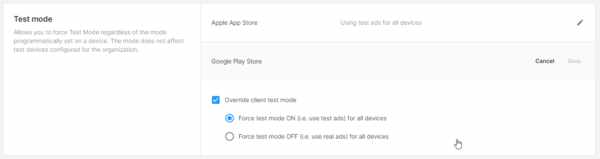
Prior to publishing your game, enable test mode by following these steps:
- From the Monetize Dashboard, select your project.
- Select project Settings from the navigation bar.
- Scroll down to the Test mode section.
- Edit either the Apple App Store or Google Play Store depending on which device you want to enable the test mode.
- Select the Override client test mode checkbox, then select the Force test mode ON for all devices radio button.
- In the Unity Editor, click the Play button to run your project and test your ads implementation.
Now,back to Unity, sometimes Unity ADS turn themselves off again, make sure they are still on. And, even though test mode is now forced, enable test mode here as well.
Now, finally, let´s make the ads appear. First, let´s make the initializer load our ad after initializing.
Add this var in the AdsInitializer.
|
public class AdsInitializer : MonoBehaviour, IUnityAdsInitializationListener |
In the On InitializationComplete method add this
|
public void OnInitializationComplete() |
And to debug, add this Debug.Log to the OnUnityAdsLoaded method inside the InterstitialAdExample script
|
public void OnUnityAdsAdLoaded(string adUnitId) |
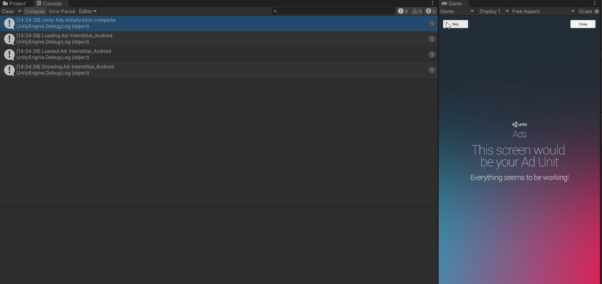
This should be loading our ad now, let´s run it.
Perfect. Let´s´set this up that on every menu toggle, an ad plays.
In the GameManager script, add a public var for the interstitial script.
|
public class GameManager : MonoBehaviour |
And call showAd and loadAd right after in toggleMenu
|
public void ToggleMenu() interstitialAdExample.LoadAd(); if (menuItem.activeSelf) |
Ideally you should check if the ad is loaded first but for this videos purpose it should be right leaving it like this.
Now run, and press the toggle once you see it loaded in the console. And there it goes.
And that´s it for the Ad setup! Congratulations! You now got ads in your project!
Remember that to know more, you can always visit the oficial Documentation
Or take a look at our more in depth video. Link in the description!
Alright! Now it´s time for our In app purchases and Qonversion integration in the next Article! Make sure to check that one out as well! And check out the video!