

Sponsored by Qonversion dot io.
Set up a project for In-App purchases with Qonversion.io
Let´s start this journey by setting up a Qonverion.io account. And creating a new project to manage.
Get to Qonversion.io, and login or create an account. It´s completely free to do so don´t worry about that.

In your Dashboard, click the New Project option from the dropdown menu.

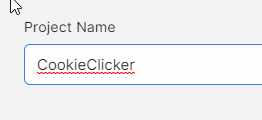
Name it.
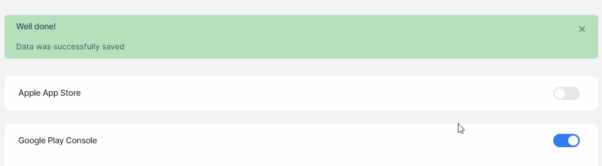
In our case, only enable the google play console

And fill out the required fields with your Google Play Console data.
So that means that for this section, you will need to set up a google play console developer account.
To upload games/apps to the play store, you will need a Google Developer Account.
You can register as a developer using the link below:
After you create an account, you will need to set up a google payment profile to receive payouts from google.
Refer to the following guide on how to set up a google payment profile:
https://support.google.com/paymentscenter/answer/7161426?hl=en
Now. you will need to create an app and get the necessary data for Qonversion. Let´s quickly overview the necessary steps on to do so.
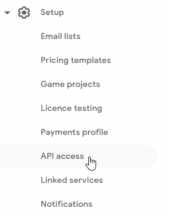
Go to Google Play Developer Console and login using your Google Developer Account credentials. Click the Setup icon in the left menu bar.
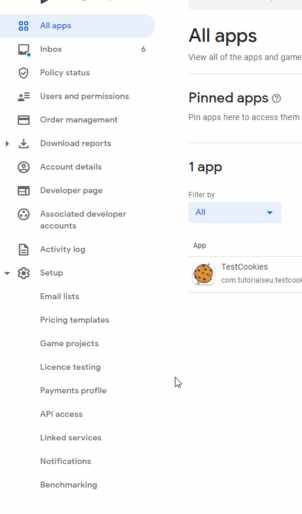
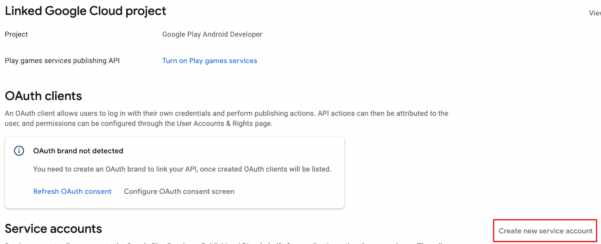
Click on API Access
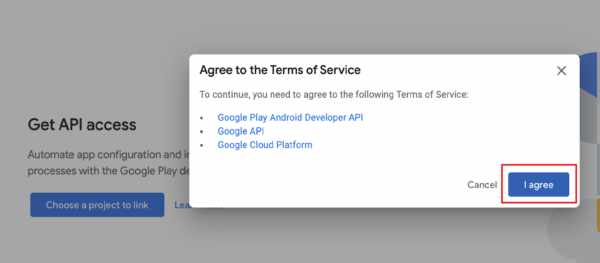
Choose a project to link and I agree.
For this step you´ll need a google cloud project, if you don´t have one set up. Just select Create new project and then Link existing project.
Now, Click on create new service account
Follow these steps to Google Cloud Platform
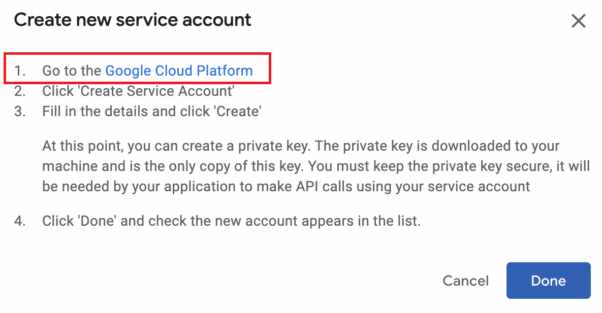
Go to Service Accounts
Create New Service Account
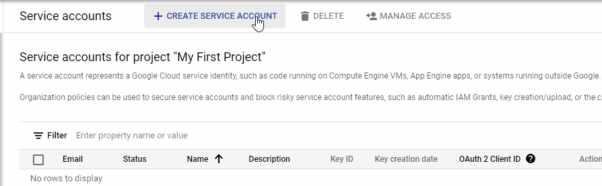
Fill out the form
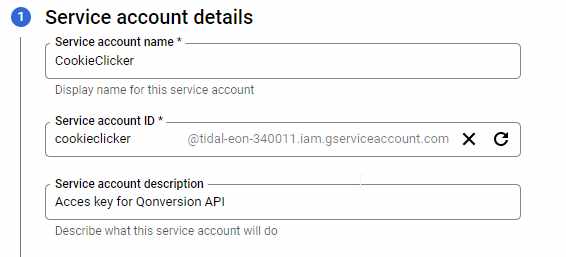
Choose the Monitoring Viewer and continue.
Make sure to add Pub/Sub Admin role (to enable Google Real-Time Developer Notifications)
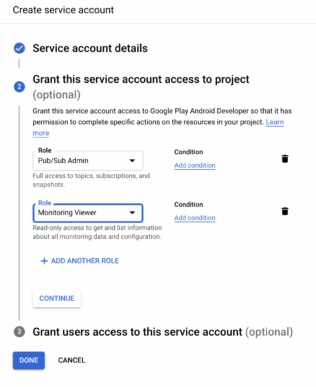
Click on Done, Open your new Service Account and Add Key
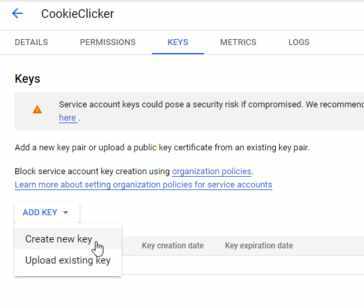
Download your JSON file by clicking the Create button.
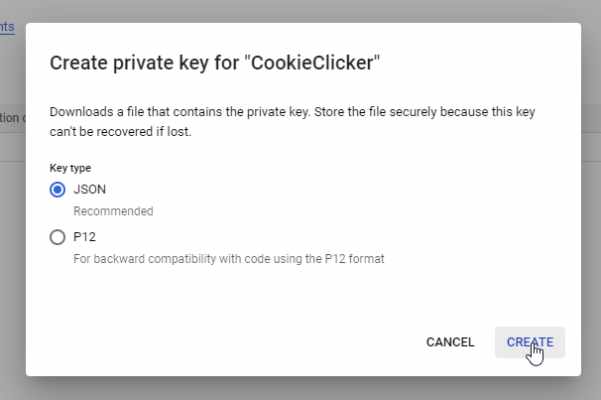
And it should download right on to your computer.
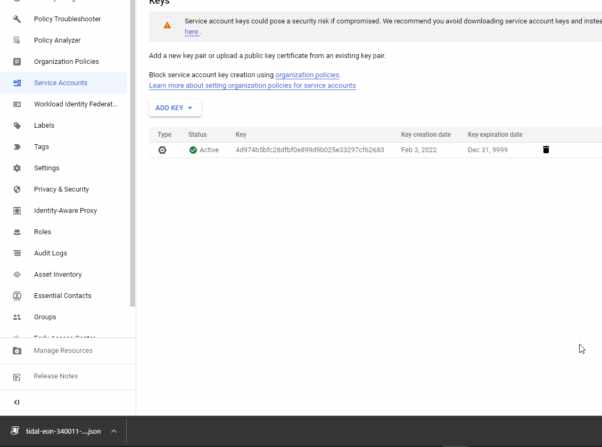
Be careful with this key since this grants access to your cloud resources, so make sure to store it securely.
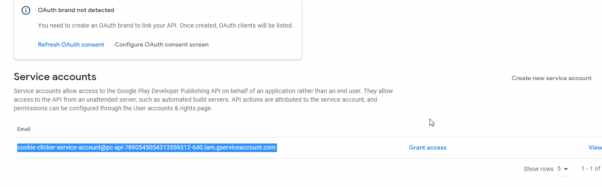
When you configure your service account in the step 5, you need to grant users access to the service account (although Google shows the step is optional). If you skip the step, Google Play Console API access page will not show newly created service account.
So, go back to your Google Console, grab the new user email
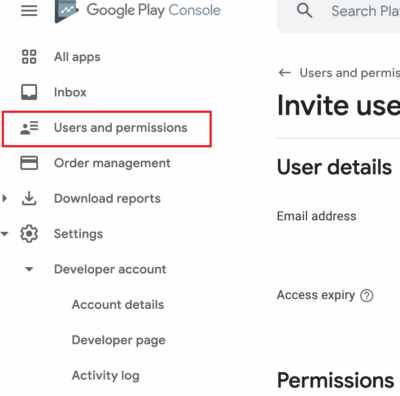
And click Users and Permissions.
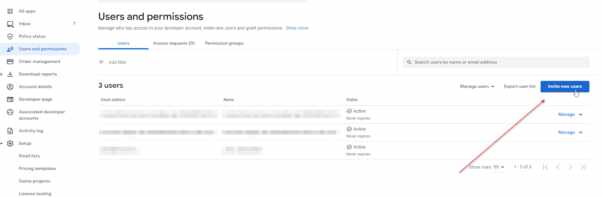
Invite new users
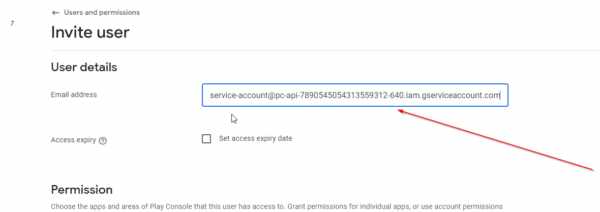
Add the email to the User Details
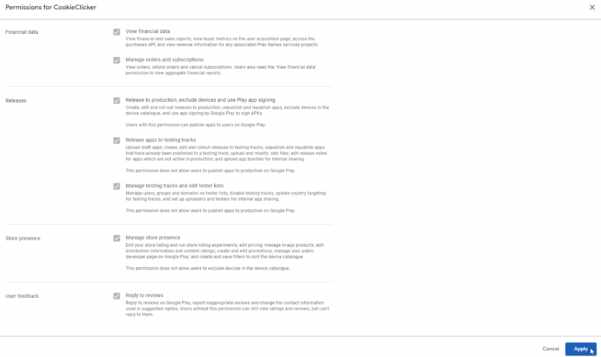
And either set the Account Permission to Admin
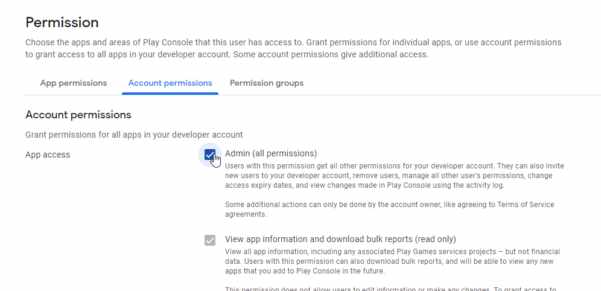
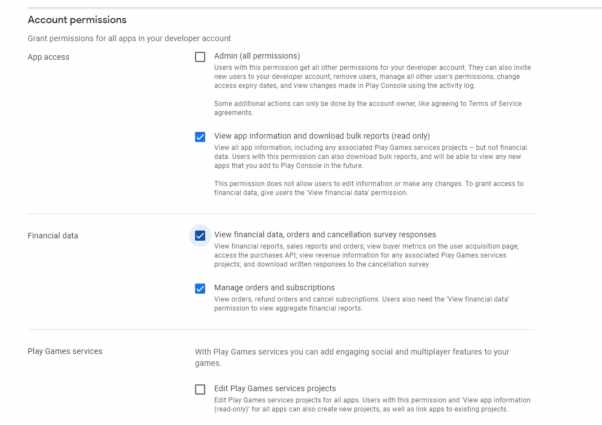
Or just these three permissions minimum
- View app information (read-only)
- View financial data
- Manage orders and subscriptions.
Now add our app in App Permissions
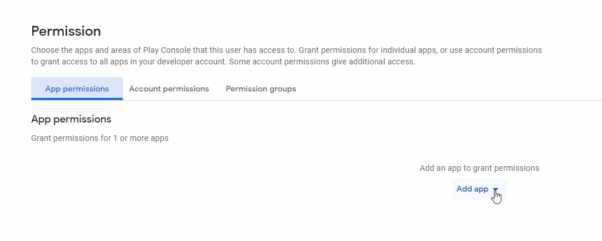
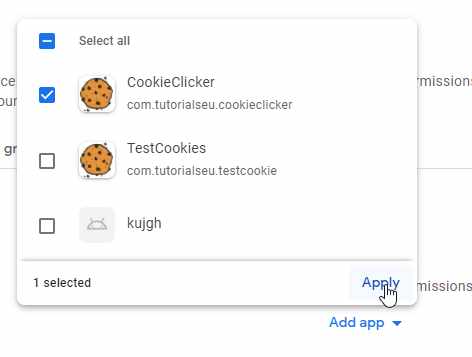
And Apply on the pop up
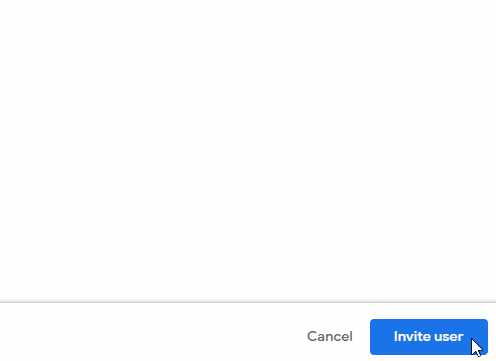
Finally, Invite user.
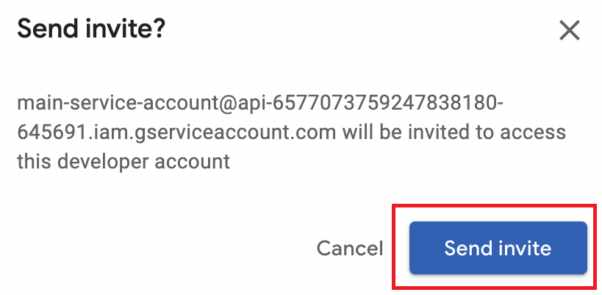
And Send Invite
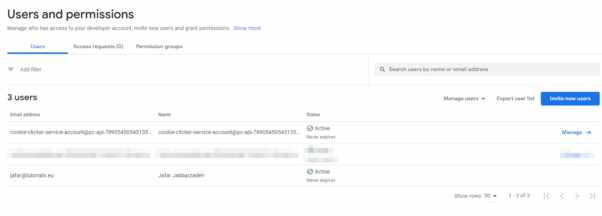
You can also invite your own email account, we could do that just in case it is needed in the future.
For that just repear the steps with your own email address and you should end up with something like this
For the last step, Paste the credentials JSON to Qonversion project settings.
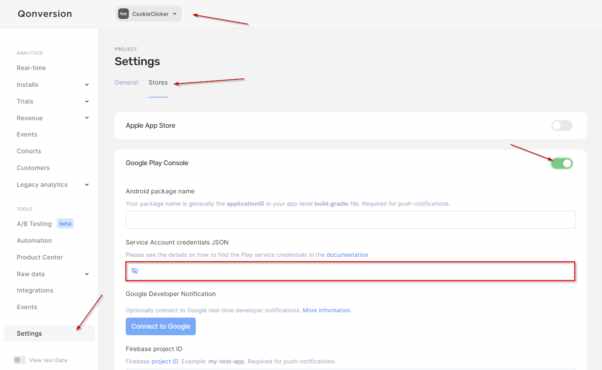
Open the json file in the text editor of your choice. Copy paste the contents in the Credentials JSON field

Add your Application ID.
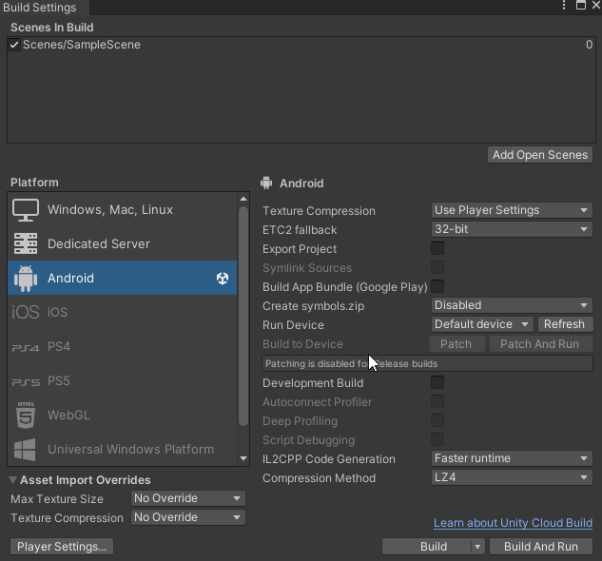
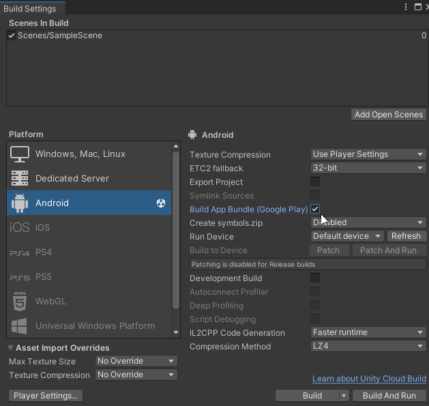
To get your Application ID, you have to, in your Unity Project, first, have the ANdroid Module installed, then switch to Android as the Target Platform
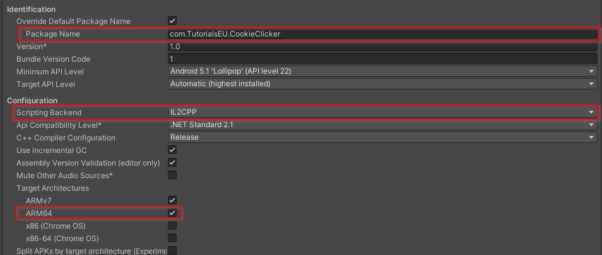
Then, in project Settings > Player > Other Settings, Set a Package name, something like com.YourCompanyName.YourProjectName, Set Scripting API to IL2CPP, and enable ARM64
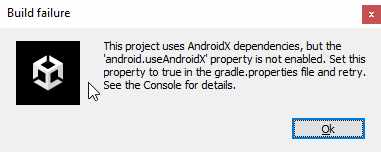
Also, to avoid getting this error while uploading your app to the google play store

In your Project Settings > Player > Other Settings, Make sure to set target API Level to at least 30

You might need to update your Android SDK after this change.
Now, copy your package name and paste it in Qonversion.
Click Save, and you should have it set
Creating our products
For this next sections, in app purchases need to be created in the Google play store. If you already got your products ready, skip to the product creation section in Qonversion, if not, let´s take a quick look over the process by creating one subscription and one one-time purchase.
In google play console, make sure you have an App created. In All Apps, click on Create App and fill out the details as needed.

Once you got your app made, click on the newly created app.

On the sidebar, under Monetise > Products, click on Subscriptions

If you haven´t uploaded an app bundlet, you´ll need to do so to start this process.you can upload a build right now even if the game´s still incomplete, this can be updated later.

To create a build, go back to your project and try to make a build, make sure to have the app bundle option clicker, this will make sure to create an .aab file, since from now that is the only file format Google will accept.
If you haven´t signed your app yet, or get this error on build
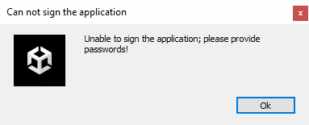
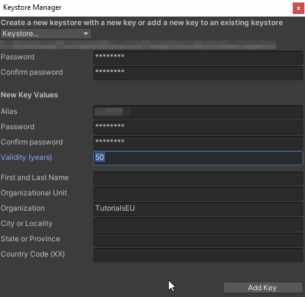
Make sure to Use the Key Store Manager in Project Settings > Player > Publishing Settings, to create a key store, user and password, and set them in the spaces below
Now, with the final .aab file, In the Google Play Console DashBoard, follow the start testing now steps
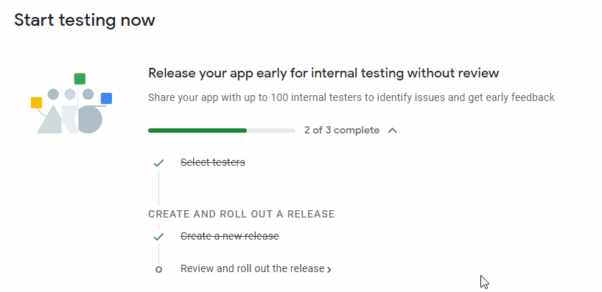
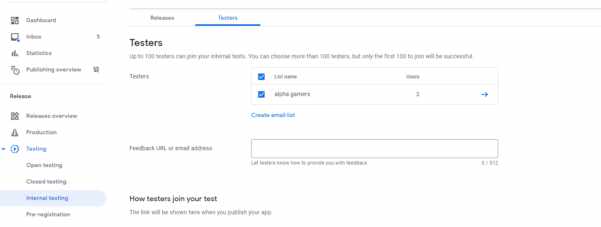
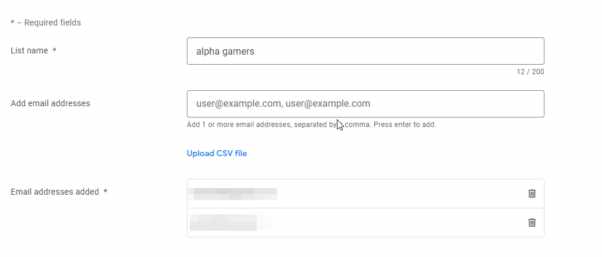
That is select your testers, in Testing Internal Testing, set up an email list
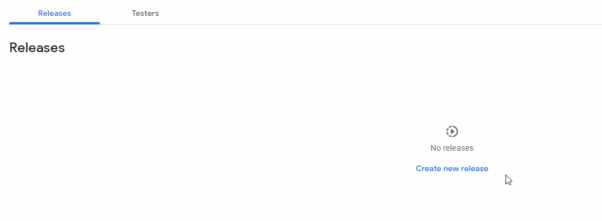
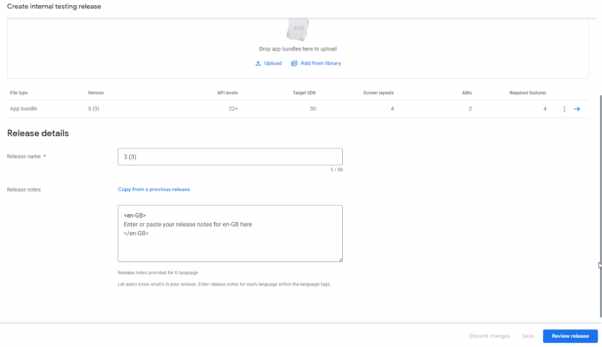
In Releases, create a new release
And upload your app bundle > Save.
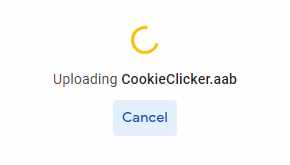
Once correctly uploaded, SAVE.
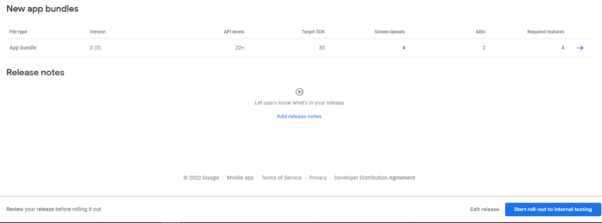
Review Release.
Start roll out to internal testing
If you are still getting the BILLING issue, we need to enable in app purchases as a service inside of Unity
In your services, activate In App Purchases
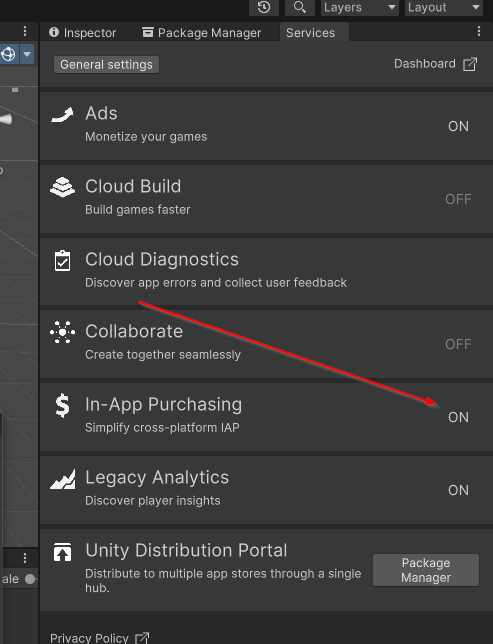
If you open the In App purchases window by clicking on it, you see a jey you must enter. That key, even though Unity says that we need to access Services and API´s, it´s now under monetization in our Google developer console

Now that we have our in Unity in app purchases ready, since this means that we are using Unity´s billing system, we will need to activate Observer mode for Qonversion to avoid duplicate billing.
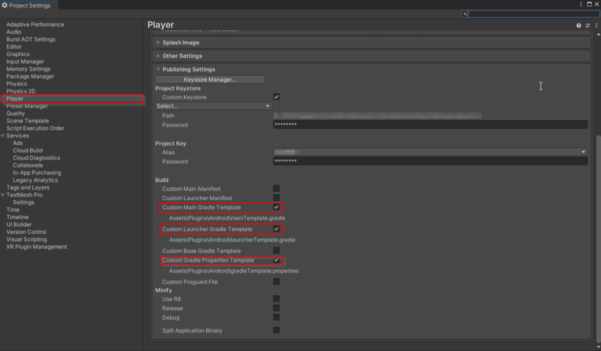
To do that enter player settings within Unity and check Custom Main Gradle template and Custom gradle properties template

This will generate a MainTemplate.gradle file, navigate to Assets > Plugins > Android and open that file, then, add the following line after dependencies
|
dependencies { |
Now, make sure that you have the following lines in your mainTemplate file
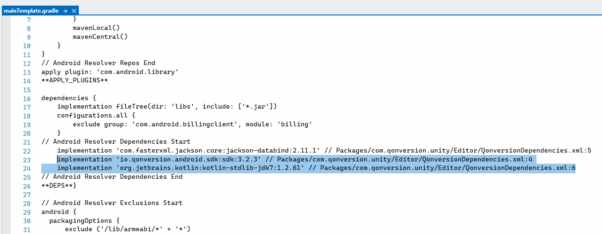
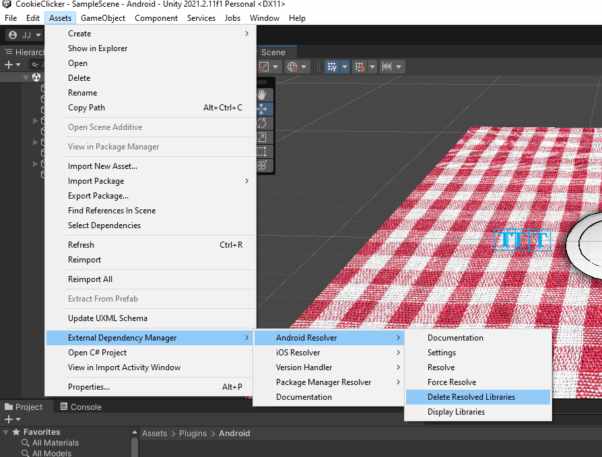
If you don´t, you may need to Delete resolved dependencies: Assets -> External Dependency Manager -> Android Resolver -> Delete Resolved Libraries
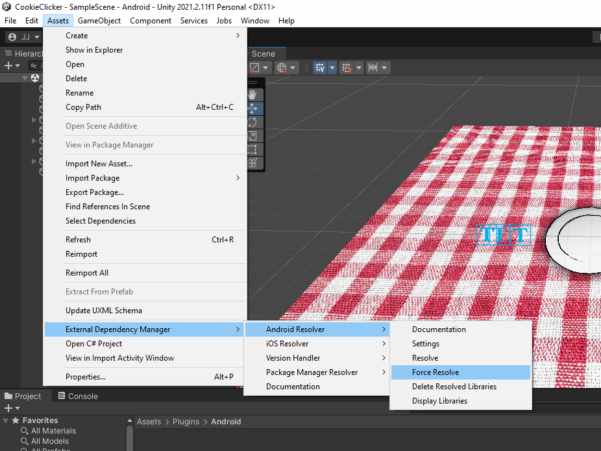
And then Force Resolve
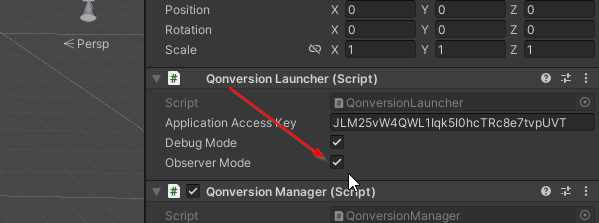
And finally, in your Qonversion launcher, enable Observer mode
Upload your new .aab file and you should be able to add products
Now we can continue to set up our In App Products.
Starting with subscriptions. Monetise > Products > Subscriptions
Create new Subscription

Make sure to Activate it

And so that we can start with that and a one time purchase
Repeat the process for Monetise > Products > In App Products
Create Product

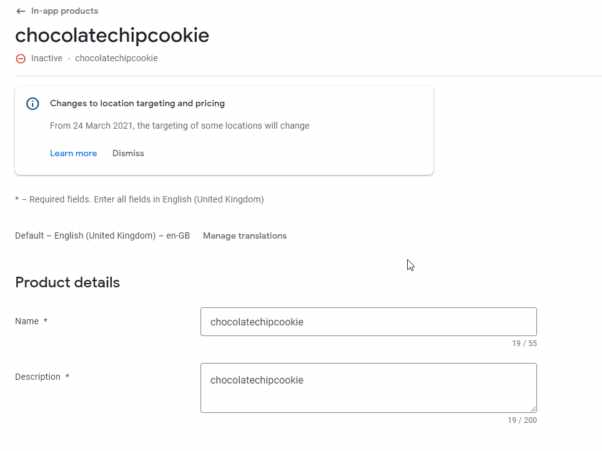
Activate that as well. And that´s it

Great. Now, let´s get them into Qonversion
In video we will go more in detail on each one, and its features.
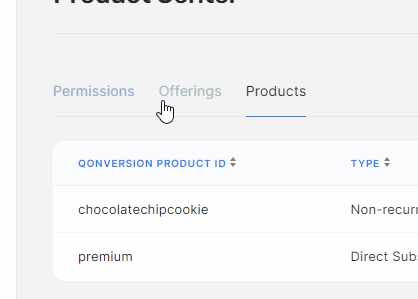
In Qonversion.io Dash. Go to Product Center
And create product
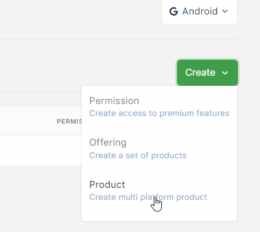
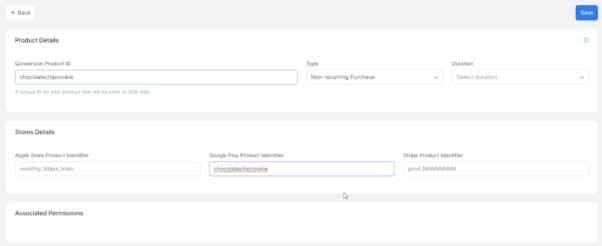
Products are a cross-platform in-app purchase that represents Apple and Google Products in Qonversion. Every product has duration and type.
Using the ChocolateChipCookie as an example,set up the same product you got in Google Play Store and add the ID to the Google Play Store Product Identifier, set it to Non-recurring Purchase, and press save
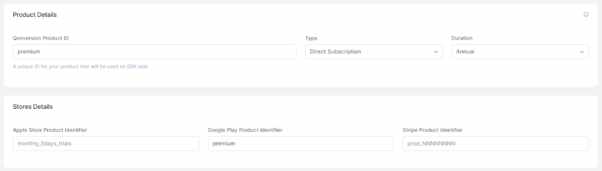
Repeat the same with our Premium Subscription, but as a Direct Subscription.
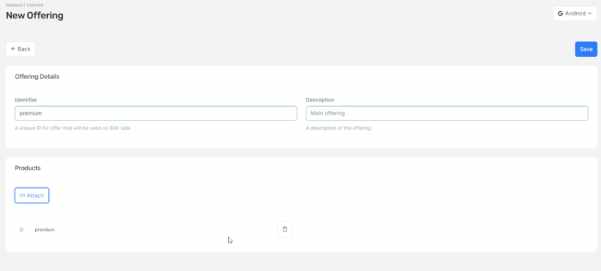
Now, Create an offering, we will be using the Offering system for purchasing the subscription
An offering is a group of products that you can offer to a user on a given paywall based on your business logic. For example, you can offer one set of products on a paywall immediately after onboarding and another set of products with discounts later on if a user has not converted.
Offerings allow changing the products offered remotely without releasing app updates.
Qonversion offerings are not required to use Qonversion’s Infrastructure Mode, but they enable the following features:
- Run A/B tests
- Change products offered to your users without app release
- Store products and experiment results in one place with aggregated data on them
We only want to test out the in game code of purchasing through offerings, so with just adding the subscription to it it´ll be enough.
Set it up with the Premium product added
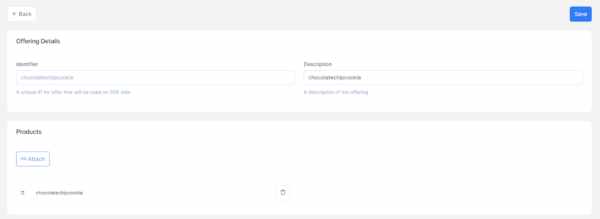
Also for the Chocolate chip cookie
And make the same for Permissions
Permission is access to some premium features of your application. Examples of permissions could be:
- YouTube Premium
- Netflix Standart, Netflix Premium
- Duolingo Plus
Most applications have only one permission that provides premium access.
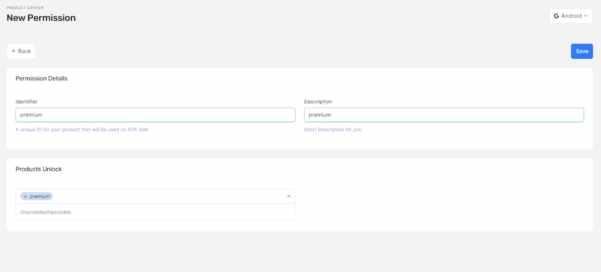
Same for chocolatechip

Now that we have everything set up, let´s implement the Qonversion SDK into our app
Implementing Qonversion.io into our Unity Project
We will be installing Qonversion.io through Git.
If you don´t yet have Git installed on your PC make sure to go to this link and do so.
https://git-scm.com/download/win
Restart after install.
Inside your Manifest.json file in your Unity project, you can find it by typing the name in the file explorer search bar. Write under dependencies this line
|
“com.qonversion.unity”: “https://github.com/qonversion/unity-sdk.git#3.2.1” |
Let it download.
Now, get the external dependency manager, from this link. Hit download.
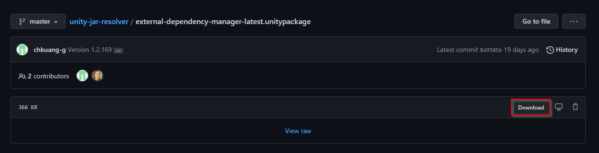
And import this unitypackage into your project
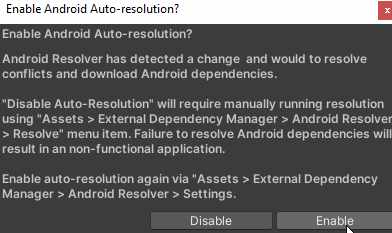
Click on enable
If there is an error, usually restarting the Editor will suffice.
If you get this specific error

Then the solution is.
Right Click My Computer and select Properties, Click on advanced tab, select environment variables and then edit JAVA_HOME to point where the JDK software is located.
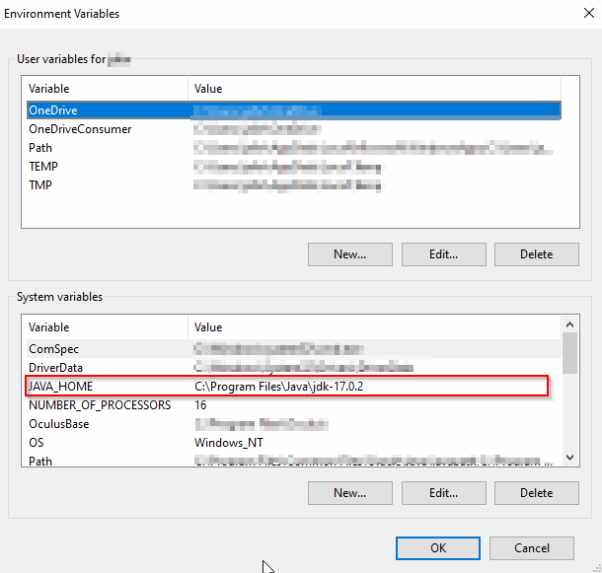
If you don´t have a JAVA_HOME variable, you´ll need to create one, also, if you don´t yet have the JAVA JDK, make sure to download it over at https://www.oracle.com/java/technologies/downloads/#jdk17-windows
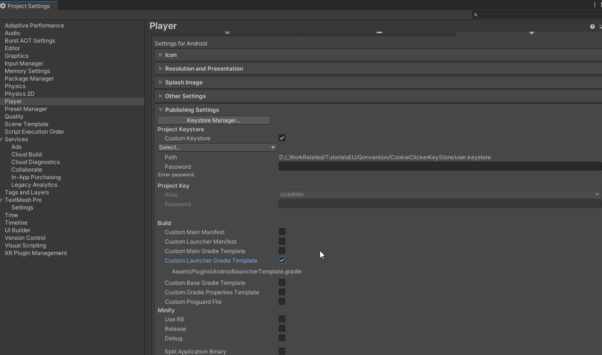
Now, to enable Multidex, Go to Project Settings > Player > Publishing settings and enable Custom Launcher Gradle Template
Open the new file and add under dependencies
|
apply plugin: ‘com.android.application’ dependencies { |
And just on top of that
|
apply plugin: ‘com.android.application’ defaultConfig { |
Also, if you are trying to make a build and this error pops up
You usually just need to set, in project settings > player > publishing settings and enable gradle properties template
This will create this file wich´ll include this line
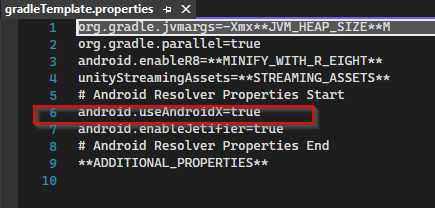
That is what we needed. If it´s not there, just add it under **ADDITIONAL_PROPERTIES**
|
android.useAndroidX=true |
And that is it. Conversion is successfully installed on to your Project.
Next up, let´s try it out with some purchases.
Buying a Subscription and removing ads in app
Finally, it´s time to use the Qonversion SDK and make the magic happen.
For unity, step 1 is pretty straight forward. Qonversion has a Launcher Component already set up that we just need to add to a GameObject in Scene. For that, let´s make a GameObject called QonversionManager.

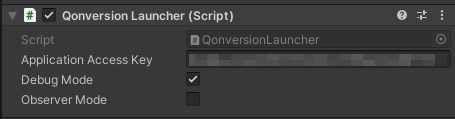
Next, just add the QonversionLauncher Component to it.
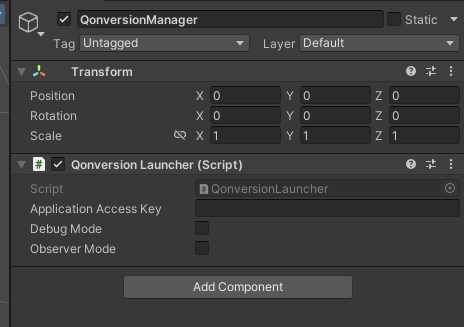
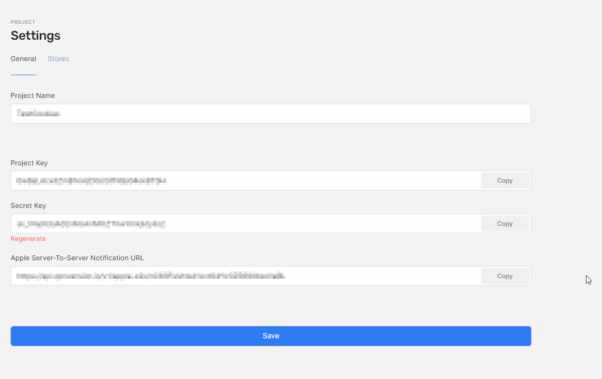
Set your Project key, which you should have in your Qonversion Dash under Settings, and since we´ll be testing, set it to Debug Mode.
What this component does is essentially launch the conversion service and pre configure some of it´s configurations. If we open the script we´ll see what exactly it does.
It got 3 variables, one for the acces key, one for the Debug mode and one for observer mode

The access key being your Qonversion project key.
Debug mode being a mode for testing or sandbox purposes. To see the sandbox users turn on the Viewing test Data toggle in Qonversion Dashboard. You can set the flag with SDK to distinguish sandbox and production users.
And lastly observer mode which allows you to use Qonversion with your existing in-app subscription flow.
Then, in the start method, we can see the activation of debug mode. As you can see accessing Qonversion methods is as easy as typing Qonversion dot and getting a list of available methods, one of them being SetDebugMode
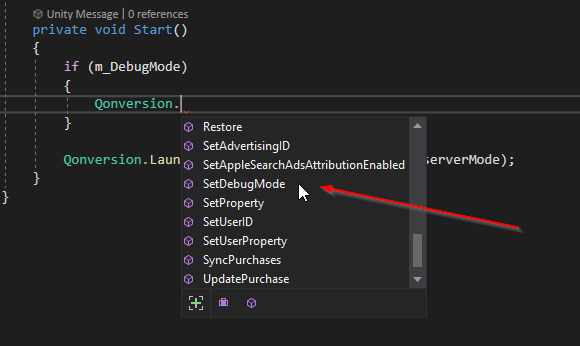
And, finally, to launch, Qonversion.Launch with your access key and observer mode variable

Also, another method we could use is the SetProperty method, let´s just try it out right here in the launcher
|
Qonversion.Launch(m_ApplicationAccessKey, m_ObserverMode); |
User properties are attributes you can set on a user level. You can send user properties to third party platforms as well as use them in Qonversion for customer segmentation and analytics.
For example, if we add UserProperty and dot
|
Qonversion.Launch(m_ApplicationAccessKey, m_ObserverMode); |
We can see that Visual studio already gives us a few options there
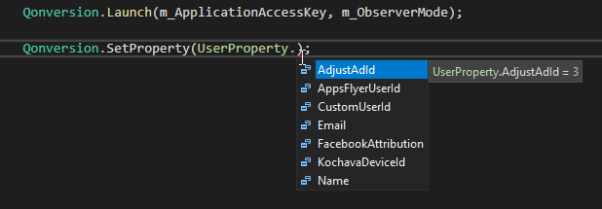
Let´s say we want to add a custom UserId to be able to track users from different platforms as well, it would be something like this
|
Qonversion.Launch(m_ApplicationAccessKey, m_ObserverMode); |
Simple as that! For the simplicity of this tutorial we won´t be needing to do so, so we´ll be removing this line again, but you could easily do so if you needed using SetProperty. Maybe set this up in a custom Qonversion manager script, like the one we are going to set up right now!
By the way, you can get more info on SetProperty on the oficial documentation!
https://documentation.qonversion.io/docs/user-properties
Or if you want us to cover this part make sure to like this video and let us know in the comments below!
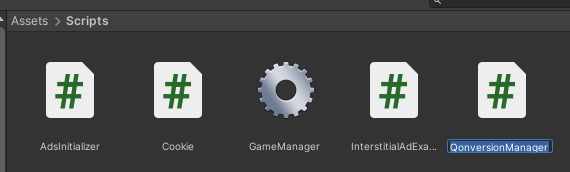
Ok! let´s now show our Premium subscription offering. For that, let´s create a new Script called QonversionManager
In there, we´ll set it up with the using QonversionUnity tag on top.
|
using System.Collections; |
Then, create a new method called, ShowOfferings()
|
public void ShowOfferings() |
In there, let´s list our offerings
|
public void ShowOfferings() |
Inside Qonversion.Offerings we now have access to offerings.AvailableOfferings, which is a list of offerings from your Dash, so let´s use that to add show it as a purchase option.
First create a TextMeshProUGUI var called premiumText;
|
public class QonversionManager : MonoBehaviour |
Control + Dot to add the using tag
|
using System.Collections; |
To make sure it starts empty, or as whatever you want, set it in Start() to a string
|
void Start() |
Now, inside the previous method we set up, just in case, check for an error
|
public void ShowOfferings() |
Now, if there´s no error, we´ll get to actually showing them, first, let´s show the premium offering. For that, let´s first check if a premium offering exists
|
public void ShowOfferings() |
And if all goes well, just set the value of premiumText to Whatever you want.
|
public void ShowOfferings() |
That will already show your subscription name, since we only have one right now, it´ll just show the one we are after.
Now, let´s make the button actually buy us a subscription.
For that, let´s make another method.that takes a string value so to determine what we want to purchase. MakePurchase(string productID)
|
public void MakePurchase(string productID) |
This time, well be using the Qonversion.Purchase method.
|
public void MakePurchase(string productID) |
This will make a purchase for our Offering, it´ll look for the offering with the set ID and set it to purchase
Let´s make the button press buy this product.
First, add the Button to our script as a public var and add the using UnityEngine.UI tag
|
using System.Collections; |
Then, in our ShowPremiumOfferings method, under the text change, add this.
|
public void ShowOfferings() |
This will call the MakePurchase Method with the correct productID Attached to it each time the button is clicked.
Don´t forget to add the GameObejcts to the inspector

If you want to try it out already, make sure to call the showOfferings method somewhere, one option would be in the Start method.
|
// Start is called before the first frame update |
But then you´ll need to change the QonversionLauncher.cs to launch in Awake()
|
private void Awake() //FROM START TO AWAKE |
After the successful purchase we can check the permission status to check if the user got a premium subscription.
For that, we´ll use check permission.
|
public void CheckPermission(string permissionID) |
This will Check if the user has the Premium permission, if yes, it´ll tell us that we have the subscription.
Moving on to enabling and disabling ads.
The simplest way would be the following.
In the InterstitialAdExample.cs add a bool called showAdd
|
public class InterstitialAdExample : MonoBehaviour, IUnityAdsLoadListener, IUnityAdsShowListener |
Now, in the ShowAd method, just check if the bool is true
|
// Show the loaded content in the Ad Unit: |
Now in the QonversionManager, add the var InsterstitialAdExample insterstitialAdExample;
|
public class QonversionManager : MonoBehaviour |
ANd in Check permission, set it to false if permission is true and if the checked permission is premium
|
public void CheckPermission(string permissionID) |
Now, if the premium permission returns true, ads are going to not be shown.
Just call it on successful purchase and done
|
public void MakePurchase(string productID) |
Great, now, let´s do the same for the cookie skin!
Buying In-Game Skin for our Cookie
To get that, we just need to check for, instead of if it´s the “premium” offering, we check if it´s the “chocolatechipoffering”. So let´s get to ShowOfferings, and add rhis
|
public void ShowOfferings() |
Now, let´s add the chocolate cookie button as a var
|
public class QonversionManager : MonoBehaviour |
And just do an addlistener like before, but with the respective productID
|
public void ShowOfferings() |
And honestly, that´s it! Let´s just make use of it by checking permission
|
public void CheckPermission(string permissionID) |
Now, we need to disallow cookie swap if permission is not granted, for that, let´s make it simple and just add a swapAllowed bool to the gameManager.cs
|
public class GameManager : MonoBehaviour |
And, in swapCookie, check if it´s true before continuing
|
public void SwapCookie(GameObject cookie) |
Now, in QonversionManager, just set it to true if permission is there, and false, if not.
|
public void CheckPermission(string permissionID) |
And with that everything should work fine!
If we go and test the app, we can see the purchase pop up appear and everything seems to work fine

And once the purchase goes through, we´ll be able to see it
Thank you for going through the article with us and I wish you good luck with your project! And check out the video for the step by step video format!